
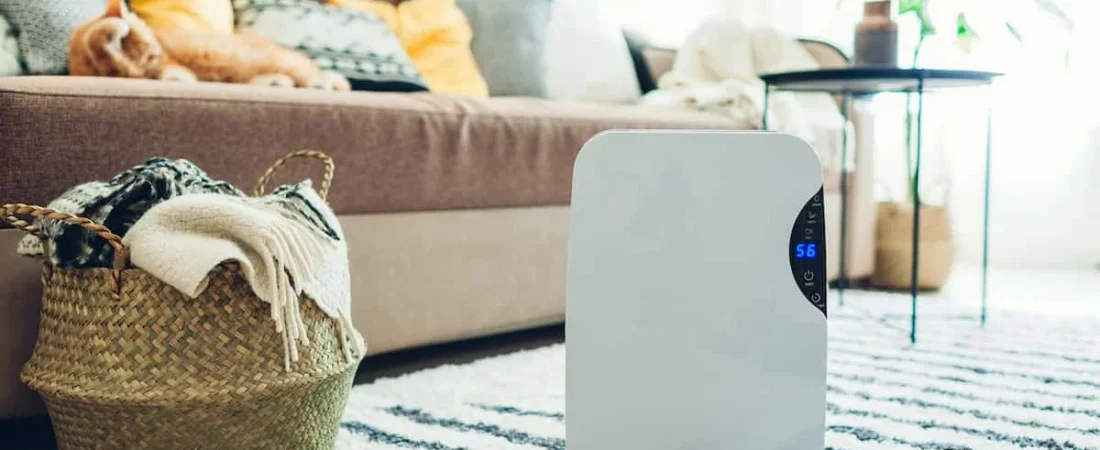
Indoor humidity above 60% is enough to trigger mold growth within 24 to 48 hours — yet most people fighting a damp home are solving the wrong problem entirely. They buy a dehumidifier, run it for a week, and wonder why the moisture keeps coming back. The real issue isn’t that you have too much moisture in the air. It’s that you haven’t found where it’s being generated — and a dehumidifier is just a bucket, not a fix.
What Actually Causes High Indoor Humidity (It’s Not What You Think)
The standard advice blames cooking, showers, and breathing — and yes, those contribute. But the sources most people overlook are structural: crawl spaces with exposed soil, single-pane windows creating condensation surfaces, and thermal bridging in walls that creates cold spots where moisture parks itself. If your humidity feels stubbornly high despite ventilation, start looking at the building envelope, not the people living inside it.
A 1,500 sq ft home generates roughly 3 gallons of moisture per day just from occupant activity — cooking, bathing, breathing, even houseplants. Add a wet crawl space or a basement slab without a vapor barrier, and that number can double. The moisture doesn’t stay where it originates; it moves toward cooler surfaces and lower pressure zones, which is why your bedroom window fogs up even though the shower is two rooms away.
Stack effect is the counterintuitive villain here: warm moist air rises through your home, escapes at the top, and pulls replacement air in from the bottom — often through a damp crawl space. You’re not just trapping moisture; you’re actively drawing it in from outside your living space. Understanding this cycle changes every decision you’ll make about how to reduce indoor humidity.
What Humidity Level Should Your Home Actually Be At?
The EPA recommends keeping indoor relative humidity between 30% and 50%. Aim for the lower half of that range in summer when outdoor humidity is high, and the upper half in winter when the air dries out and you need some moisture for comfort. A simple digital hygrometer — they cost under $15 — tells you exactly where you stand.
One honest nuance: what feels comfortable at 50% relative humidity varies significantly by temperature. At 65°F, 50% RH feels perfectly dry. At 80°F, that same 50% feels clammy and oppressive because warm air holds more moisture and your body struggles to cool itself through evaporation. This is why chasing a single number without accounting for room temperature leads people astray.
| Relative Humidity Level | What It Means for Your Home | Recommended Action |
|---|---|---|
| Below 30% | Too dry — skin irritation, static, wood cracking | Add a humidifier or houseplants |
| 30–50% | Ideal range for comfort and air quality | Maintain with ventilation and monitoring |
| 50–60% | Elevated — dust mites thrive, musty odors possible | Increase ventilation, check moisture sources |
| Above 60% | Mold risk zone — act immediately | Dehumidify, find and fix moisture sources |
How to Find Your Home’s Hidden Moisture Sources Before Fixing Anything
Trying to lower humidity without identifying your sources is like mopping a floor while the faucet’s still running. Before you spend a dollar on equipment, spend 30 minutes with a flashlight doing a moisture audit. Check under sinks for slow drips, look at window sills for condensation staining, and peer into the crawl space if you have one.
A plastic sheeting test works surprisingly well for diagnosing slab moisture: tape a 12-inch square of clear plastic to your concrete floor or basement wall, seal all four edges, and check it after 24 hours. Moisture on the underside means it’s coming through the concrete. Moisture on the top means it’s condensing from the air — two different problems with two different fixes.
Pay particular attention to the gap between your dryer exhaust duct and the exterior wall. A partially disconnected dryer vent can silently pump 5 to 10 gallons of moist air into your wall cavity every week. It’s one of the most overlooked moisture sources in residential buildings, and it creates the ideal conditions for mold long before you ever notice a smell.
How to Reduce Indoor Humidity Without a Dehumidifier
Ventilation is free, and it’s usually the first thing people skip. Cross-ventilation — opening windows on opposite sides of the house to create airflow — can drop indoor humidity by 5 to 10 percentage points on days when outdoor humidity is lower than indoors. Check the outdoor humidity on your phone’s weather app before opening windows; if it’s above 70% outside, you’ll make things worse, not better.
Your exhaust fans are dramatically underused. The bathroom fan should run for at least 20 minutes after every shower, and the kitchen range hood should run any time you’re boiling water or simmering on the stovetop. Most people flip the bathroom fan on, shower, and turn it off the moment they step out — but that’s right when humidity peaks, as the steam from wet surfaces finishes evaporating.
Here’s something most guides don’t say clearly: cold showers produce roughly 30% less steam than hot showers. If you’re battling chronic bathroom humidity and you can tolerate a slightly cooler shower, it’s a meaningful reduction that costs nothing. Not a trade everyone’s willing to make, but worth knowing it’s an option.
Houseplants are often cited as humidity boosters to avoid, but the reality depends entirely on quantity. One or two plants in a 200 sq ft room contribute negligible moisture. Thirty plants in a small apartment is a different conversation. Don’t ditch your fiddle-leaf fig over humidity fears unless you’re already running a greenhouse in your living room.
Do Dehumidifiers Actually Fix the Problem — or Just Mask It?
Dehumidifiers genuinely work — within their designed capacity. A unit rated for 30 pints per day in a 500 sq ft space will keep up. But run that same unit in a 1,500 sq ft basement with exposed soil and no vapor barrier, and it’ll run 24 hours a day, empty constantly, and barely move the needle. You’re fighting physics with an undersized tool.
“A dehumidifier placed in a space with an unaddressed moisture source is a symptom manager, not a solution. In clinical terms, you’re treating the fever without treating the infection. My first question to any homeowner dealing with persistent indoor humidity is always: where is the water coming from, not how do we remove it from the air?”
Dr. Marcus Veld, Building Science Consultant and Certified Indoor Environmental Professional (CIEP)
Sizing matters more than brand loyalty. The rule of thumb: measure the square footage of the space, factor in whether it’s below grade (basement adds roughly 10 pints to your required capacity), and whether the space has notable moisture issues. An oversized dehumidifier short-cycles and wears out faster. An undersized one runs continuously without reaching your target humidity.
Placement also has a bigger impact than most product instructions suggest. Put the unit in the center of the space if possible, away from walls, with at least 6 to 12 inches of clearance on all sides for airflow. A dehumidifier shoved into a corner against the wall is running at maybe 60% of its rated efficiency.
What’s the Fastest Way to Lower Humidity in a Specific Room?
If you need to bring down humidity in a single room quickly, the fastest approach is a combination attack: run the room’s dehumidifier or portable AC unit on “dry” mode, open windows on the opposite side of the house (if outdoor conditions allow), and eliminate any active moisture source in that space immediately. This three-pronged approach works faster than any single method alone.
Air conditioning is actually one of the most effective dehumidification tools you already own. A central AC system removes a significant amount of moisture as a byproduct of cooling the air — a typical 3-ton system can remove 15 to 25 pints of water per hour. The problem is that most thermostats are programmed to cool, not dehumidify, so the AC shuts off based on temperature before humidity is fully addressed.
Some modern smart thermostats have a humidity override mode that keeps the AC running slightly longer to hit a humidity target, not just a temperature one. It’s worth checking if yours has this feature — it costs nothing to activate and can make a noticeable difference in summer months without any new equipment.
How to Reduce Humidity in a Basement or Crawl Space
Basements and crawl spaces are where most home humidity problems actually originate, yet they get addressed last. The soil under your home contains significant moisture, and without a vapor barrier, that moisture migrates upward into the living space constantly — regardless of weather, season, or how dry things feel above ground.
A 6-mil polyethylene vapor barrier laid over exposed crawl space soil is one of the highest-return moisture interventions available to homeowners. It doesn’t require professional installation in most cases, it costs under $200 in materials for a typical crawl space, and it can reduce whole-home humidity by 10 to 15 percentage points by cutting off the ground as a moisture source. Seal the seams with tape and extend the barrier up the foundation walls by at least 6 inches for best results.
Basement wall insulation placement matters more than most homeowners realize. Insulation installed on the exterior of the foundation wall keeps the concrete warm and reduces condensation. Insulation on the interior keeps the concrete cold, which creates a condensation surface. If you’re dealing with sweating basement walls, the insulation solution might actually be making things worse.
Daily Habits That Generate More Humidity Than You Realize
The gap between knowing the sources and actually changing behavior is where most people lose ground. Small daily habits compound over weeks into chronic humidity problems that feel impossible to solve. These are the specific ones that generate the most moisture and are easiest to modify:
- Air-drying laundry indoors: A single load of wet laundry releases roughly 4 to 5 pints of moisture as it dries. If you’re doing this daily in a small apartment, you’re adding nearly 2 gallons of water to your air every 24 hours. Use an outdoor line or tumble dry whenever possible.
- Cooking without the range hood: Boiling a pot of pasta generates more moisture than a 5-minute shower. The range hood vents that steam directly outside — use it every single time the stove is on, not just when you’re frying.
- Leaving bathroom doors open while showering: Humid shower air migrates into the hallway and adjacent bedrooms within minutes. Keep the bathroom door closed during and for 20 minutes after showering, and run the exhaust fan throughout.
- Overwatering houseplants: Waterlogged soil evaporates moisture constantly, even when the plant itself isn’t transpiring. Water only when the top inch of soil is dry, and use saucers that don’t allow standing water.
- Storing firewood indoors: Unseasoned firewood can release significant moisture as it continues to dry inside your home. Store it outside or in a covered outdoor space, and only bring in what you’ll use within 24 hours.
How Ventilation Systems Actually Control Indoor Humidity
Exhaust-only ventilation — which most homes rely on — creates negative pressure that pulls outdoor air through random gaps in the building envelope. In humid climates, that replacement air is often more humid than what you’re exhausting, which means you can run your bathroom fan diligently and still struggle with moisture levels. It’s a real and frustrating paradox.
Energy Recovery Ventilators (ERVs) solve this by exchanging indoor and outdoor air while transferring humidity between the two airstreams. In summer, the ERV pre-conditions incoming outdoor air so it doesn’t spike your indoor humidity. In winter, it recovers moisture from outgoing air to prevent the indoor air from getting too dry. They’re expensive to install — typically $1,500 to $3,500 including labor — but they’re the only mechanical solution that addresses both ventilation and humidity simultaneously.
For those not ready to install an ERV, running bath fans on a timer rather than manually can meaningfully reduce whole-home humidity over time. A $20 in-wall timer set to run the bathroom exhaust fan for 30 minutes every 3 hours provides continuous background ventilation without anyone having to think about it.
Pro-Tip: Set your dehumidifier’s built-in humidistat to 50% rather than “continuous” mode. Continuous mode runs the unit regardless of actual humidity levels, wearing out the compressor faster and wasting electricity. At 50%, the unit cycles on and off as needed — which is more efficient, extends the machine’s life, and keeps your home in the ideal humidity band rather than drying it out below comfortable levels.
Does Sealing Your Home Reduce Humidity or Make It Worse?
Air sealing is almost universally recommended for energy efficiency — and it genuinely reduces the infiltration of humid outdoor air in summer. But a tightly sealed home without controlled ventilation traps indoor-generated moisture with nowhere to go. This is how energy-efficient new construction ends up with mold problems that older, leakier homes never had.
The building science principle is “build tight, ventilate right.” Seal the envelope to control where air moves in and out, then deliberately introduce fresh air through controlled pathways. An airtight home with an ERV or a well-designed mechanical ventilation system handles humidity better than any other configuration. An airtight home with no ventilation strategy is asking for trouble.
Weatherstripping and caulking around windows and doors is still worth doing — it prevents the kind of random, uncontrolled air movement that creates cold spots and condensation problems. Just pair it with something that intentionally manages fresh air exchange, even if that’s just a deliberate window-opening habit when outdoor conditions allow.
Natural Methods for Reducing Humidity That Actually Have Mechanisms Behind Them
Rock salt and silica gel absorb moisture passively — they’re not myths. But their capacity is genuinely limited. A pound of rock salt absorbs roughly 1 to 2 ounces of moisture before it becomes saturated and stops working. Useful in a small enclosed space like a closet or a gun safe; not useful in a 1,000 sq ft basement. Scale matters enormously with passive absorbers.
Activated charcoal (not the grilling kind — food-grade or commercial desiccant charcoal) works similarly to silica gel and has the added benefit of absorbing odors along with moisture. It’s rechargeable by placing it in sunlight for a few hours, which drives out absorbed moisture and resets its capacity. For small spaces, it’s a genuinely practical and chemical-free option.
Good ventilation habits and structural fixes are ultimately what make natural moisture reduction work at scale. If you want to go the chemical-free route for the whole home, the approach is source control first, then cross-ventilation, then passive absorbers in problem spots like closets and bathroom cabinets. For a fuller look at this approach, preventing mold naturally covers the overlap between moisture management and keeping mold at bay without synthetic treatments.
When Your HVAC System Is Making the Humidity Problem Worse
An oversized air conditioner is one of the most common and least discussed causes of high indoor humidity. A unit that’s too large for the space cools the air quickly and shuts off — before the moisture has time to condense on the evaporator coil and drain away. The result is air that feels cool but remains humid, often described as “clammy” despite the temperature being fine.
This is sometimes called short-cycling, and it’s a consequence of improper load calculations when the system was installed. The fix isn’t a new unit in every case — a technician can sometimes adjust the blower speed or refrigerant charge to extend run times. But if your AC is genuinely oversized by a ton or more, dehumidification will always be compromised regardless of settings.
Dirty evaporator coils and clogged condensate drains also reduce your AC’s dehumidifying capacity by up to 30%. Annual maintenance — which most HVAC companies recommend anyway — includes checking both. A clean system dehumidifies as well as it cools; a neglected one does neither particularly well.
How to Know If Your Humidity Reduction Efforts Are Actually Working
Measuring is the only honest answer here. Perception is unreliable — people acclimate to their home environment, and what feels “normal” is often just what they’re used to. A $12 digital hygrometer placed at the center of your main living space gives you a real number to track. Check it at roughly the same time each day for two weeks before and after any intervention.
Look for these specific signs that your actions are having an effect:
- Window condensation disappears in the morning rather than lingering until midday
- Musty smell fades within a week of reducing moisture sources
- Hygrometer readings drop below 55% consistently, not just on dry days
- Allergy symptoms ease — dust mites die off significantly below 50% RH
- Wood furniture and floors stop swelling or sticking
If you’ve addressed the obvious sources, run ventilation diligently, and humidity still sits above 55% consistently, that’s diagnostic information. It points to a structural moisture source — a crawl space, a slab, a slow leak — that won’t yield to behavioral fixes alone. That’s when it’s worth bringing in a professional with a moisture meter and thermal camera to find what you can’t see.
The long game with indoor humidity isn’t about constant intervention — it’s about building a home that manages moisture passively. Once you’ve sealed the envelope properly, addressed structural sources, and sized your mechanical systems correctly, maintaining good humidity becomes a matter of monitoring rather than fighting. That’s the shift most people don’t realize is possible: from reactive problem-solving every summer to a home that simply stays comfortable year-round without constant effort.
Frequently Asked Questions
How can I reduce indoor humidity naturally?
By improving ventilation, airflow, and daily moisture habits.
Does opening windows reduce humidity?
Yes, especially when combined with airflow.
Do dehumidifiers always work?
They help when used correctly and consistently.
How long does it take to lower indoor humidity?
Usually days or weeks, depending on conditions.