
Bad insulation doesn’t just make your home cold — it quietly destroys your indoor humidity balance, and almost nobody talks about that half of the problem. Most guides treat insulation as an energy story and humidity as a separate air quality story. They’re actually the same story, and misunderstanding that connection is why so many homeowners spend money on dehumidifiers, fresh paint, and allergy medications while the real fix is sitting in their walls.
What Is the Real Relationship Between Indoor Humidity and Insulation?
Here’s the core mechanism most people miss: insulation doesn’t just resist heat transfer — it controls where condensation happens. When warm, moisture-laden air from inside your home migrates toward a cold surface, it eventually hits its dew point and water drops out of the air. If your insulation is doing its job, that cold surface stays safely outside the building envelope. If it isn’t, that condensation point moves inward — sometimes right into your wall cavity, your attic deck, or your ceiling drywall.
That’s not a minor inconvenience. Liquid water sitting in a wall cavity at 60–70°F is a perfect environment for mold, which begins colonizing surfaces in as little as 24 to 48 hours. The insulation-humidity relationship is a moisture management relationship first, and a temperature management relationship second.
Think of insulation as a gate that decides where the warm-cold boundary lives. Push that boundary deep into the wall or above the attic floor, and you keep the condensation zone outside your living space. Let it slip inward through thin, compressed, or missing insulation, and you’re essentially inviting outdoor moisture physics to play out inside your home.
Why Does Poor Insulation Raise Indoor Humidity Levels?
Cold surfaces attract moisture — that’s basic physics. A poorly insulated exterior wall might have an interior surface temperature of 45°F on a cold day, even if the room itself is 68°F. At that surface temperature, the relative humidity of the air touching that wall can be at or near 100%, even if your hygrometer in the center of the room reads a comfortable 45%. You don’t see the problem until you peel back the drywall or notice a musty smell that won’t quit.
Air is also constantly moving through gaps, and poorly insulated homes almost always have more air leakage. Every cubic foot of outdoor air that sneaks in during summer carries humidity with it; every infiltration point in winter creates a cold spot that draws moisture from indoor air. The insulation failure and the air sealing failure usually arrive together because they share the same root cause: an incomplete building envelope.
There’s also a less obvious mechanism involving thermal mass and overnight cycling. Walls with inadequate insulation cool down fast after sunset and warm up fast after sunrise. That daily temperature swing means the interior wall surface repeatedly crosses the dew point threshold, creating small but cumulative moisture deposits that eventually saturate building materials. Multiply that by weeks or months, and you have a hidden moisture issues situation that looks like a cleaning problem or a ventilation problem — but is actually an insulation problem wearing a disguise.
How Does Insulation Type Affect Moisture Control Differently?
Not all insulation handles moisture the same way, and picking the wrong type for your climate can make indoor humidity worse, not better. Fiberglass batts are the most common insulation in North American homes, but they’re vapor-permeable — meaning moisture can pass through them relatively freely. In a humid climate, that permeability means outdoor water vapor can migrate inward unless you pair the insulation with an appropriate vapor retarder.
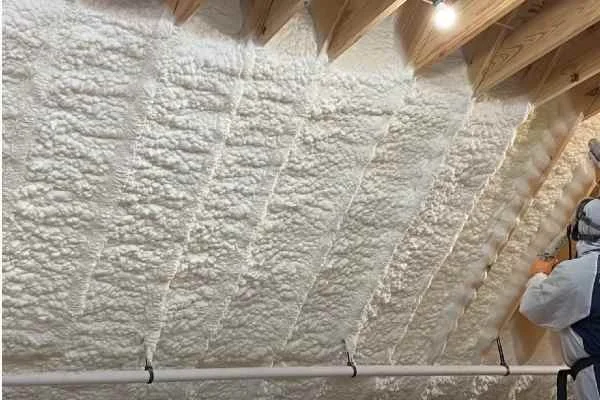
Closed-cell spray polyurethane foam (SPF) works fundamentally differently. It creates both an air barrier and a vapor barrier simultaneously, with a perm rating below 1.0 at typical thicknesses of 2 inches or more. That makes it extremely effective at stopping moisture-laden air infiltration, which is why it’s often the right answer in high-humidity climates or in spaces like crawl spaces and rim joists where air sealing matters more than raw R-value.
Open-cell spray foam and cellulose occupy a middle ground — better air sealing than fiberglass batts, but still vapor-permeable enough that moisture can migrate through them over time. The honest nuance here is that vapor permeability isn’t always bad. In cold climates, a fully vapor-impermeable assembly can trap moisture inside the wall if any water gets in from the interior side during winter. The right insulation choice genuinely depends on your climate zone, your wall assembly design, and whether you’re more worried about winter condensation or summer vapor drive.
| Insulation Type | Air Barrier? | Vapor Barrier? | Best Humidity Control Use Case |
|---|---|---|---|
| Fiberglass Batts | No | No | Dry climates with separate vapor retarder |
| Closed-Cell Spray Foam | Yes | Yes (at 2″+) | High humidity climates, crawl spaces |
| Open-Cell Spray Foam | Yes | No | Mixed climates, interior walls |
| Cellulose | Partial | No | Cold climates, retrofits |
What Is the Dew Point Problem Nobody Explains Properly?
Dew point is the temperature at which air becomes saturated and can no longer hold its water vapor — at that point, water condenses on whatever surface it touches. Your insulation’s job is to keep every surface inside your home above that dew point temperature. The moment any surface drops below it, you have liquid water forming somewhere you can’t see.
Here’s the counterintuitive part: you can have a perfectly comfortable 50% relative humidity in your living room and still have condensation forming inside your wall cavity. That’s because the dew point of 68°F air at 50% RH is about 48°F — and a poorly insulated wall cavity can easily reach that temperature on a winter day. Your hygrometer says everything is fine. Your wall says otherwise.
This is why whole-home humidity management and building envelope performance are inseparable. Dropping indoor humidity to 40% raises your margin of safety considerably because now the dew point of that same 68°F air falls to about 41°F — a temperature that’s harder for even mediocre insulation to reach at interior surfaces. Running lower indoor humidity in winter isn’t just about comfort; it’s an active moisture management strategy that compensates for insulation gaps.
“Most homeowners think about insulation and humidity as two separate systems to maintain. They’re not — they’re a single moisture management system, and optimizing one without understanding the other is how you end up with mold in a well-heated house. The dew point calculation is the missing link. Once you understand where condensation will form in your specific wall assembly, every other decision — insulation type, vapor retarder placement, target indoor humidity — falls into place logically.”
Dr. Karen Olesky, Building Science Engineer and Certified Energy Auditor
How Does Insulation Affect Energy Efficiency and Humidity Control Together?
Here’s where the two storylines merge in a way that has real dollar consequences. Your HVAC system has two jobs: temperature control and latent heat removal (which is the technical term for dehumidification). These two loads are linked. A well-insulated home stays closer to its target temperature, which means the air handler runs longer cycles at lower intensity — and longer run times mean more passes of air across the evaporator coil, which is where dehumidification actually happens.
A poorly insulated home, by contrast, creates oversized heating and cooling loads. Contractors often respond to this by installing larger HVAC equipment to compensate. Bigger equipment cycles on and off more quickly — “short cycling” — and short cycling is terrible for humidity control because the coil never runs long enough to pull meaningful moisture out of the air. You end up with a home that’s at the right temperature but chronically humid, and no amount of adjusting the thermostat will fix it because the root cause is the insulation deficit, not the equipment.
Improving insulation doesn’t just lower your energy bill — it often allows you to right-size your HVAC equipment, which directly improves the system’s ability to manage indoor humidity. That’s a compounding benefit that most energy efficiency discussions skip entirely because they’re focused on BTU loads rather than moisture loads.
Pro-Tip: If your home feels clammy even when the AC is running and the temperature is correct, check your insulation before blaming the HVAC. Short-cycling from an oversized system — often installed to compensate for poor insulation — removes far less moisture per hour than a properly sized system running steady, longer cycles. Fix the envelope first; resize the equipment second.
Which Areas of Your Home Need Insulation Most for Humidity Control?
Not all insulation gaps are created equal when it comes to humidity impact. Some locations in your home are dramatically more influential on indoor moisture levels than others, and prioritizing them strategically gets you the most improvement per dollar spent.
- Rim joists and band joists — These are the horizontal framing members at the top of your foundation wall. They’re almost always under-insulated, they’re major air infiltration points, and they sit right at the level where outdoor humidity meets conditioned indoor air. Closed-cell spray foam here is one of the highest-return investments in moisture management you can make.
- Attic floor or roof deck — Attics are where humidity disasters silently develop. Warm, moist air rises from the living space, infiltrates the attic through ceiling penetrations, and condenses on cold roof decking. Maintaining at least R-38 on the attic floor (or a full unvented attic assembly with spray foam on the roof deck) dramatically reduces this risk.
- Crawl spaces — An unencapsulated crawl space under a home is essentially a direct pipeline for ground moisture into your living space. Insulating and vapor-sealing a crawl space routinely drops whole-home relative humidity by 5 to 10 percentage points — without touching anything else.
- Exterior walls in humid climates — In Climate Zones 1 through 3 (hot and humid), exterior walls with insufficient insulation allow summer vapor drive — outdoor moisture pushing inward through the wall. Adding continuous exterior insulation shifts the dew point calculation favorably and keeps wall cavities drier year-round.
- Around windows and doors — The framing around windows and doors is typically under-insulated relative to the rest of the wall. These spots create the cold interior surfaces where condensation first appears in winter, and they’re also responsible for a disproportionate share of air infiltration moisture load.
Does Adding Insulation Always Fix Humidity Problems?
Adding insulation without addressing air sealing can actually make things worse — and that’s a mistake that happens constantly in well-meaning home improvement projects. Insulation slows heat transfer; it does not stop air movement. If you pack more fiberglass into a leaky wall, you’ve improved the R-value but done nothing about the air infiltration that’s carrying humidity in. The moisture load may actually concentrate more in the improved insulation because the wall cavities stay colder longer, pushing the dew point violation deeper into the assembly.
Air sealing and insulation need to work as a system. The Building Science Corporation’s research consistently shows that air leakage accounts for 25 to 40% of heating and cooling loads in typical homes — and essentially 100% of the moisture infiltration load that isn’t coming from ground vapor. You can’t insulate your way out of an air leakage problem.
There’s also a ventilation consideration that’s easy to overlook. Tightening a home’s envelope reduces uncontrolled air infiltration — which is good — but it also reduces the dilution ventilation that was accidentally managing some indoor pollutants and excess moisture. A properly tightened and insulated home needs mechanical ventilation, typically an HRV (Heat Recovery Ventilator) or ERV (Energy Recovery Ventilator), to maintain healthy indoor air quality without the humidity swings that come from random infiltration.
How Do You Know If Insulation Is Behind Your Humidity Problems?
Humidity problems that trace back to insulation failures have a recognizable pattern once you know what to look for. The symptoms cluster in specific locations rather than distributing evenly through the home, and they often correlate with outdoor temperature changes rather than indoor activities like cooking or bathing.
Condensation on windows during cold weather is the most visible sign, but it’s often misread as a window problem rather than a wall assembly and humidity problem. Window condensation in winter means the interior glass surface is below the dew point of your indoor air — which tells you either your indoor humidity is too high, your windows are under-insulated (single-pane or failed IGUs), or both. Switching to triple-pane glass without addressing indoor humidity levels just moves the condensation problem to the next coldest surface in the room.
Room-to-room humidity variation is another signal worth investigating. Rooms with exterior walls on two or three sides, rooms above garages, and rooms above uninsulated crawl spaces consistently run higher humidity than interior rooms — and those temperature differences in surface conditions are what drive the moisture accumulation. If one bedroom always feels damp or one corner always smells musty, the likely culprit is an insulation gap in that specific section of the building envelope rather than a whole-home ventilation issue.
A thermal camera scan during cold weather makes insulation gaps immediately visible as bright spots (cold areas) on exterior walls and ceilings. Many energy auditors include this in a basic energy audit, and it takes the guesswork out of identifying exactly where your building envelope is underperforming.
What Are the Signs That Insulation Has Already Been Damaged by Moisture?
Moisture-damaged insulation is a serious problem because it loses its effectiveness progressively while the damage stays hidden. Wet fiberglass batting can lose 40% or more of its rated R-value, which creates a feedback loop: worse insulation means colder surfaces, colder surfaces mean more condensation, more condensation means wetter insulation, and the cycle continues.
The warning signs to watch for include:
- A persistent musty or earthy smell in specific rooms that doesn’t respond to cleaning or airing out
- Visible staining or discoloration on drywall, particularly in the lower corners of exterior walls or along ceiling-wall junctions
- Paint bubbling or peeling on exterior walls from the inside out (water vapor pushing through)
- Unexplained spikes in indoor humidity that began after a heavy rain event or after a winter with unusual temperature swings
- Higher-than-expected energy bills without a clear lifestyle explanation, suggesting the insulation’s thermal performance has degraded
- Soft spots or slight give when pressing on drywall surfaces near exterior walls, indicating the underlying structure has absorbed moisture
Any of these signs warrants a proper investigation rather than surface-level remediation. Painting over a stain or running a dehumidifier near a musty corner treats symptoms. Pulling back the wall to inspect the insulation and cavity condition treats the actual problem.
What Target Indoor Humidity Levels Work Best With Different Insulation Setups?
Your target indoor humidity isn’t a fixed number — it’s a range that should shift based on your insulation quality, your climate, and the outdoor temperature. The reason is simple: the colder it gets outside, the colder your interior surfaces become even with good insulation, and the lower you need to keep indoor humidity to stay above the dew point threshold on those surfaces.
A well-insulated home in Climate Zone 5 (think Minneapolis or Chicago) can comfortably maintain 40% to 45% RH in deep winter without condensation problems because good insulation keeps interior surfaces warm. The same 45% RH in a poorly insulated home in the same climate might produce condensation on walls, windows, and attic surfaces because those surfaces are running 10 to 15°F colder than they should be. The insulation quality directly determines how aggressively you need to manage humidity in winter.
A practical framework for setting winter humidity targets based on outdoor temperature:
| Outdoor Temp (°F) | Max Recommended Indoor RH (Well-Insulated Home) | Max Recommended Indoor RH (Poorly Insulated Home) |
|---|---|---|
| 20°F to 32°F | 40% | 30% |
| 0°F to 20°F | 35% | 25% |
| Below 0°F | 30% | 20% |
Running humidity too low isn’t comfortable either — below 30% RH, most people notice dry skin, irritated sinuses, and static electricity. That’s why improving insulation has a quality-of-life benefit beyond energy savings: it lets you maintain comfortable humidity levels without damaging your home’s structure. You’re not choosing between comfort and safety; better insulation lets you have both.
How Should You Approach Fixing Insulation and Humidity Together?
Start with a blower door test and thermal imaging, not with insulation purchases. A blower door test quantifies how leaky your building envelope is and, combined with thermal imaging on a cold day, identifies exactly where the leakage and thermal bridging are occurring. Without this data, you’re guessing — and insulation work that targets the wrong areas wastes money while leaving the real moisture pathways open.
Address air sealing before or simultaneously with insulation upgrades. Spray foam applied to rim joists, attic penetrations, and foundation sill plates simultaneously seals and insulates — it’s the most efficient sequence for moisture control. Adding blown-in cellulose or fiberglass to an attic without first sealing the ceiling penetrations below is a common sequencing mistake that limits the effectiveness of the insulation work considerably.
Finally, reassess your mechanical ventilation strategy after tightening the envelope. A newly tight home needs about 0.35 air changes per hour of fresh air to maintain healthy indoor air quality — typically provided by an ERV or HRV sized to the home’s volume. This controlled ventilation replaces the random infiltration that was accidentally diluting indoor moisture sources, and it does so without the humidity swings that come from uncontrolled air movement. Getting this right is what separates a genuinely comfortable, low-humidity home from a sealed box with its own set of air quality problems.
Conclusion
The real payoff from understanding the connection between indoor humidity and insulation isn’t just a lower energy bill or a drier basement — it’s that you stop chasing symptoms. Once you understand that a cold wall surface is a condensation risk before it’s a comfort problem, and that a short-cycling AC unit is a humidity problem before it’s a temperature problem, the decisions get cleaner. As building envelopes continue to get tighter and more efficient, the precision required in humidity management will only increase — which means the homeowners who understand why these systems interact, not just what to do, will be the ones whose homes stay healthy and comfortable for decades without expensive surprise repairs.
Frequently Asked Questions
Can poor insulation cause high indoor humidity?
Poor insulation doesn’t directly increase humidity levels, but it creates cold surfaces where existing moisture condenses and accumulates. This makes normal humidity levels feel more problematic and can create localized damp conditions even when your overall indoor humidity measures within the recommended 30-50% range.
Why do damp spots appear only in certain areas?
These areas typically have weaker insulation, greater heat loss, or thermal bridging that makes surfaces significantly cooler than surrounding air. Even small temperature differences of 5-10°F can trigger condensation in spots that otherwise seem random.
Can insulation-related humidity problems appear without leaks?
Yes. Temperature differences alone can cause moisture buildup.
Is insulation more important in winter or summer?
Insulation affects humidity year-round, but problems become most visible during winter when temperature differences between indoor and outdoor air are greatest. However, summer air conditioning can create similar condensation issues when humid outdoor air contacts artificially cooled surfaces.
Can insulation issues cause hidden mold?
Yes, insulation problems create ideal conditions for mold growth by maintaining higher moisture levels on specific surfaces. Because these areas often stay damp longer and receive less air circulation, mold can develop behind furniture or in corners before becoming visible in main living areas.