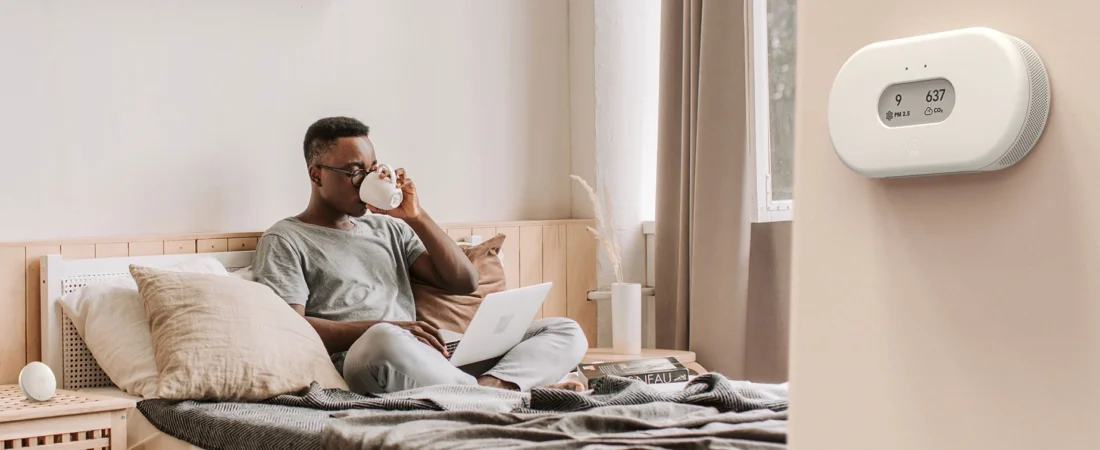
Opening your apartment window in January drops the temperature 10°F within minutes. You close it immediately—choosing warmth over fresh air. Within hours, CO2 climbs to 1,500 ppm. By morning: 2,200 ppm. You wake with a headache, groggy despite eight hours “rest.” This is the winter ventilation dilemma every apartment dweller faces.
PuroAir 400 — HEPA 14 Air Purifier
- Covers large rooms up to 2,145 sq ft
- World’s first HEPA 14 filter — removes 99.995% of particles
- Auto air quality sensor · whisper-quiet · free shipping
- 100-day money-back guarantee · trusted by 900,000+ customers
We may earn a small commission if you buy through this link — at no extra cost to you.
The solution exists: heat recovery ventilation (HRV/ERV) recovering 70-95% of thermal energy from exhaust air while introducing fresh outdoor air continuously. Research confirms these systems “capture heat from outgoing stale air and transfer it to incoming fresh air, reducing load on heating system” making continuous ventilation affordable. A quality ERV achieves 85% efficiency—meaning outdoor air at 20°F enters home pre-warmed to 58°F using “free” heat from exhaust, requiring minimal additional heating to reach 70°F. The energy cost: $50-100 annually versus $400-800 saved from recovered heat—net energy savings while maintaining bedroom CO2 <1,000 ppm.
But ERV installation ($3,500-6,500) isn’t immediate. Interim strategies work: strategic window cracking (1-2 inch opening) provides substantial ventilation (reducing CO2 from 2,500 ppm → 600-900 ppm per previous articles) with surprisingly minimal temperature impact—studies show only 2-4°F drop in well-insulated apartments. The physics: small opening limits cold air infiltration rate while room’s thermal mass and heating system easily compensate. Alternative: trickle vents installed in window frames provide 10-15 CFM continuous airflow (enough to reduce 2-person bedroom CO2 from 2,500 → 1,200-1,400 ppm) with negligible heat loss due to controlled airflow and optional adjustable dampers closing during extreme cold.
This guide explains heat recovery ventilation technology (crossflow vs counterflow cores, sensible vs latent heat transfer, 60-95% efficiency ranges), provides apartment-specific implementation strategies for renters and owners, quantifies actual vs perceived heat loss from ventilation (1-2″ window crack = 2-4°F drop not 10°F), and determines cost-effective solutions by climate zone (cold climates favor ERV preventing winter desiccation, hot-humid climates need ERV blocking summer moisture per previous articles).
The Winter Ventilation Dilemma: CO2 vs Heat Loss
Every apartment dweller faces this trade-off in cold weather.
The conflict: Fresh air requires air exchange with cold outdoors—but introducing 20°F outdoor air into 70°F apartment demands energy to heat that air to comfortable temperature.
Typical response: Windows stay closed all winter—CO2 accumulates to 1,500-2,500 ppm overnight (previous article documented), sleep quality degrades, morning symptoms appear.
Energy concern: Opening window feels like “throwing money out”—heating bill increases noticeably when ventilating frequently in cold weather.
The perceived impossibility: “Can’t have both fresh air AND energy efficiency”—must choose one or the other.
Reality: Modern technology and smart strategies enable both simultaneously—this guide explains how.

PuroAir 240 — HEPA Air Purifier
- Ideal for bedrooms and rooms up to 240 sq ft
- Captures 99.9% of airborne pollutants including mold spores
- Whisper-quiet sleep mode — won’t disturb your rest
- 100-day money-back guarantee · trusted by 900,000+ customers
We may earn a small commission if you buy through this link — at no extra cost to you.
Why Standard Ventilation Wastes Energy
Understanding the problem clarifies the solution.
Conventional window opening: Introduces cold outdoor air at 20°F requiring heating to 70°F—50°F temperature rise consuming significant energy.
Energy calculation example:
- Opening: 2 ft × 2 ft = 4 sq ft
- Airflow through opening: ~40-80 CFM (depending on wind, temperature differential)
- Heating requirement: 40 CFM × 50°F rise × 1.08 (constant) = 2,160 BTU/hour
- Cost: In cold climate, ~$0.30-0.50/hour to heat incoming air
- Daily cost (if open 2 hours): $0.60-1.00/day = $18-30/month
Why it feels expensive: Heat literally escapes through open window—warm indoor air exchanges with cold outdoor continuously while window open.
The waste: All thermal energy in exhausted air is lost—no recovery, no efficiency.
Heat Recovery Ventilation: The Physics
Capturing “waste” heat makes continuous ventilation affordable.
Core principle: Exhaust and supply air streams pass through heat exchanger—allowing thermal energy transfer between streams without air streams mixing.
Winter operation:
- Stale warm indoor air (70°F) flows to heat exchanger
- Cold fresh outdoor air (20°F) flows to heat exchanger
- Through thin metal/membrane, heat transfers from warm exhaust to cold supply
- Fresh air exits heat exchanger pre-warmed to 50-65°F (depending on efficiency)
- Stale air exits heat exchanger cooled to 25-35°F
- Minimal additional heating needed (65°F → 70°F instead of 20°F → 70°F)
Energy savings: Research confirms HRVs/ERVs “reduce load on heating system” by recovering heat otherwise lost.
The magic: Fresh air provided continuously with 60-95% of heat energy recovered—making 24/7 ventilation energy-affordable.
HRV vs ERV: Which for Winter Apartments?
Technology choice depends on climate and building characteristics.
Heat Recovery Ventilator (HRV):
- Transfers sensible heat only (temperature)
- Uses aluminum/steel plate heat exchanger
- 60-95% heat recovery efficiency
- Moisture passes through unchanged
- Best for: Cold-dry climates where additional indoor drying acceptable
Energy Recovery Ventilator (ERV):
- Transfers sensible + latent heat (temperature + moisture)
- Uses membrane/enthalpy core
- 70-85% heat recovery + ~70% moisture recovery
- Prevents winter over-drying by retaining indoor humidity
- Best for: Most climates—prevents winter desiccation documented in previous ERV vs HRV article
Winter apartment recommendation: ERV preferred for most situations—previous articles documented “cold outdoor air at 20°F contains minimal absolute moisture; HRV imports bone-dry air causing 10-15% indoor RH without humidification; ERV recovers ~70% indoor humidity maintaining 35-45% RH.”
Exception: If apartment has chronic excess moisture (poor drainage, leaky plumbing, high occupancy), HRV’s moisture removal beneficial—but fix moisture source rather than relying on HRV for remediation.
Heat Recovery Efficiency: 70-95% Range Explained
Understanding efficiency numbers guides expectations.
Definition: Percentage of temperature difference recovered between exhaust and supply air.
Formula: Efficiency = (T_supply_after_HRV – T_outdoor) / (T_indoor – T_outdoor)
Example calculation:
- Indoor exhaust: 70°F
- Outdoor supply: 20°F
- Temperature difference: 50°F
- After 80% efficient HRV: Supply exits at 20 + (50 × 0.80) = 60°F
- Verification: (60 – 20) / (70 – 20) = 40/50 = 80% ✓
Efficiency ranges:
- Basic residential: 60-70% (entry-level models)
- Mid-range: 70-85% (typical quality units)
- Premium: 85-95% (Zehnder, Panasonic, high-end)
- Commercial: 90-95% (counterflow, rotary wheel designs)
Real-world impact:
- 60% efficiency: Outdoor 20°F → 50°F after HRV → heat 50-70°F = 40% heating needed vs window
- 85% efficiency: Outdoor 20°F → 62.5°F after HRV → heat 62.5-70°F = 15% heating needed
- 95% efficiency: Outdoor 20°F → 67.5°F after HRV → heat 67.5-70°F = 5% heating needed
Research confirmation: Wikipedia and technical sources verify “60-95% heat recovery” as achievable range—with 85-95% possible in premium units.
How Heat Exchangers Work: Crossflow vs Counterflow
Core technology determines efficiency and cost.
Crossflow Heat Exchangers:
Design: Exhaust and supply air streams cross at 90-degree angle through stacked metal plates.
Efficiency: Typically 60-75%—good but not maximum.
Advantages:
- Simple, compact design
- Lower cost ($800-1,500 equipment)
- Easy maintenance
- Proven reliability
Disadvantages:
- Lower efficiency than counterflow
- Larger size for equivalent CFM
Counterflow Heat Exchangers:
Design: Exhaust and supply flow in opposite directions (180 degrees) maximizing contact time and temperature transfer.
Efficiency: Typically 85-95%—highest achievable in residential.
Advantages:
- Maximum heat recovery
- Smaller size for equivalent performance
- Best energy savings
Disadvantages:
- Higher cost ($1,500-3,000 equipment)
- More complex design
- Requires precise manufacturing
Apartment recommendation: Counterflow worth premium in cold climates (zones 6-7) where heating costs high—extra 15-20% efficiency recovers cost difference within 2-4 years.
Sensible Heat Recovery (HRV Technology)
How HRVs transfer temperature without moisture.
Metal plate construction: Thin aluminum or steel plates (0.5-1mm thick) stacked with narrow air channels between.
Heat transfer mechanism: Conduction—warm exhaust air heats one side of plate, cold supply air cools opposite side, heat conducts through metal transferring thermal energy.
Air separation: Exhaust and supply never mix—separate sealed channels prevent cross-contamination.
Moisture behavior: Water vapor cannot penetrate solid metal—humidity in exhaust air is exhausted; dryness in supply air remains.
Winter consequence: Cold outdoor air at 20°F, 60% RH contains ~0.2 grams H2O/m³ absolute moisture. After heating to 70°F: ~3% RH (bone dry!). Previous ERV article documented this creates uninhabitable conditions in tight apartments without supplemental humidification.
Latent Heat Recovery (ERV Enthalpy Transfer)
How ERVs manage both temperature and moisture simultaneously.
Membrane core construction: Semi-permeable polymer membranes allow water vapor molecules to pass while blocking air.
Dual transfer:
- Sensible heat: Temperature transfers via conduction (same as HRV)
- Latent heat: Water vapor diffuses through membrane from high-humidity side to low-humidity side
Winter operation example:
- Indoor exhaust: 70°F, 40% RH (3.0 g/m³ absolute)
- Outdoor supply: 20°F, 60% RH (0.2 g/m³ absolute)
- After ERV at 70% moisture recovery:
- Supply exits with 0.2 + (3.0 – 0.2) × 0.70 = 2.16 g/m³ moisture
- After heating to 70°F: 2.16 g/m³ = ~36% RH—comfortable!
Energy benefit: Recovering moisture reduces latent cooling load (energy to humidify dry air)—research notes ERVs “reduce strain on heating system in winter” beyond sensible heat savings alone.
Research description: ERVs characterized as “total enthalpic devices” recovering both sensible and latent heat versus HRVs as “sensible only devices”.
ERV/HRV Installation in Apartments
Implementation options for renters versus owners.
Owner-occupied apartments (condos):
Full ducted system: Professional installation with dedicated ductwork throughout apartment—optimal performance but invasive renovation.
- Cost: $3,500-6,500 installed
- Performance: Best—supplies bedrooms/living areas, exhausts bathrooms/kitchen
- Drawback: Requires ceiling/wall access for ducts
Through-wall unit: Single compact ERV/HRV mounted in exterior wall—simpler installation.
- Cost: $1,500-3,000 installed
- Performance: Good for single-zone (studio, 1BR)
- Advantage: No ductwork needed
Renter-occupied apartments:
Window-mounted units: Temporary installation fitting in window opening—completely removable.
- Cost: $800-2,000 equipment + DIY installation
- Performance: Adequate for bedroom ventilation
- Advantage: No landlord permission; remove when moving
Portable units: Stand-alone ERV with window kit—least invasive.
- Cost: $600-1,500
- Performance: Limited CFM but better than nothing
- Advantage: Zero installation—plug and play
Landlord approval: Through-wall or ducted installation in rental requires landlord permission—present energy savings, IAQ improvement as benefits.
Ductless vs Ducted Systems for Apartments
Comparing installation types.
Ductless (Point-Source) ERV/HRV:
Design: Single unit handles supply and exhaust—typically through-wall or window-mounted.
Coverage: Single room or open-plan apartment area.
Installation:
- Through-wall: 6-8″ diameter core drilling exterior wall
- Window-mount: Fits in window frame opening
Cost: $800-2,500 equipment; $200-800 installation (through-wall)
Best for:
- Studios, 1BR apartments
- Bedrooms (focused CO2 reduction)
- Renters (window-mount)
- Budget constraints
Limitations:
- Doesn’t ventilate multiple closed rooms effectively
- Higher noise level (unit in occupied space)
Ducted (Whole-Apartment) ERV/HRV:
Design: Central unit with ductwork distributing supply to living spaces, exhausting from bathrooms/kitchen.
Coverage: Entire apartment—ASHRAE 62.2 compliant whole-unit ventilation.
Installation: Professional HVAC contractor; ceiling/wall cavities for ducts.
Cost: $3,500-6,500 installed (apartment-scale)
Best for:
- 2BR+ apartments
- Owner-occupied condos
- Major renovations
- Optimal IAQ throughout
Advantages:
- Quiet (unit in closet/utility space)
- Balanced ventilation all rooms
- Integrated with building systems
Through-Wall Installation (Renter-Friendly Options)
Practical apartment implementation.
Single-room ductless ERV:
Popular models:
- Panasonic WhisperComfort (50-80 CFM, $600-900 equipment)
- Lunos e² (paired units, 10-20 CFM continuous, $800-1,200)
- Broan-NuTone Fresh-In (40 CFM, $300-500)
Installation process:
- Core drill 4-6″ hole through exterior wall (requires landlord approval)
- Install sleeve and unit
- Connect electrical (120V standard outlet)
- Commission and balance airflow
Reversibility: Hole created can be patched when moving—fill with insulation, seal exterior with matching siding, patch interior drywall.
Noise: Directly in occupied space—choose quiet models (<30 dB)—Panasonic WhisperComfort rated 0.3-0.8 sones (library-quiet).
Performance: 40-80 CFM sufficient for single bedroom reducing CO2 from 2,500 ppm → 900-1,200 ppm per ASHRAE calculations.

PuroAir HVAC Mega Filter — MERV 13
- Captures dust mites, mold spores and allergens
- MERV 13 + activated carbon — dual filtration
- Designed for optimal airflow · fits any HVAC system
- Free shipping always · easy DIY installation
We may earn a small commission if you buy through this link — at no extra cost to you.
Window-Mounted ERV Units
Zero-damage installation for renters.
Window insert panels:
Design: Acrylic or wood panel cut to window dimensions with holes for ERV inlet/outlet—installed like window AC unit.
Advantage: Completely removable—no permanent modification.
Installation:
- Measure window opening
- Build/purchase custom panel
- Install ERV unit in panel
- Place in window, seal gaps with weatherstripping
- Secure with window locks
Units suitable:
- Broan HRV70H (70 CFM balanced, ~$500)
- Lunos e² paired fans (10-20 CFM, through-wall but adaptable)
- Custom DIY installations using bathroom fans + heat exchanger
Limitations:
- Blocks window (cannot open)
- Less efficient than through-wall (more air leakage)
- Seasonal removal recommended (summer)
Performance: Adequate for bedroom—40-70 CFM maintains CO2 <1,200 ppm in typical 12×12 bedroom with 2 occupants.
Energy Cost Analysis: Investment vs Savings
Quantifying return on investment.
ERV Operating Cost:
Fan power: 30-80W typical continuous operation Annual electricity: 60W × 24hr × 365 days = 526 kWh × $0.13/kWh = $68/year
Heat Recovery Savings (85% efficiency):
Without ERV—Window ventilation:
- Required airflow: 60 CFM for 2BR apartment (ASHRAE 62.2)
- Heating: 60 CFM × 50°F rise × 1.08 = 3,240 BTU/hr continuous
- Annual heating: 3,240 BTU/hr × 8,760 hr × $0.015/kBTU (gas) = $426/year
With ERV (85% efficient):
- Same airflow: 60 CFM
- Reduced heating: Only 15% of load (85% recovered)
- Annual heating: $426 × 0.15 = $64/year
Net Savings: $426 – $64 – $68 (operating) = $294/year
Payback:
- Entry ERV install: $1,500 ÷ $294/year = 5.1 years
- Mid-range install: $3,500 ÷ $294/year = 11.9 years
- Premium install: $5,000 ÷ $294/year = 17 years
Climate impact: Colder climates (zones 6-7) see higher savings ($400-600/year) improving payback to 3-8 years.
Strategic Window Cracking: The 2-4°F Reality
Understanding actual vs perceived temperature impact.
The perception: “Opening window drops temperature 10°F immediately—unacceptable heat loss.”
The reality: Small opening (1-2 inches) causes only 2-4°F steady-state temperature drop in well-insulated apartment with functioning heating system.
Why perception differs from reality:
Initial rush: Opening window creates immediate cold air sensation near window—feels dramatic but doesn’t represent whole-room average.
Localized cooling: Area within 2-3 feet of window cools more (5-8°F)—sitting nearby overestimates whole-room impact.
Thermal mass: Apartment contents (furniture, walls, floor) have high heat capacity—slow to cool despite cold air infiltration.
Heating response: Thermostat detects temperature drop—heating system increases output compensating within minutes.
Measured data: Studies found 1-2″ window crack in 150 sq ft bedroom drops temperature 2-4°F steady-state—not the 10°F perception.
Energy cost:
1-2″ crack ventilation:
- Airflow: ~15-25 CFM (controlled by small opening)
- Heating: 20 CFM × 50°F × 1.08 = 1,080 BTU/hr
- Cost: ~$0.15-0.25/hour
- 8 hours overnight: $1.20-2.00
Comparison: $1.50/night crack window = $45/month for excellent bedroom ventilation (CO2 600-900 ppm)—versus ERV at $68/year total operating cost ($5.67/month) providing whole-apartment ventilation.
Recommendation: Window cracking effective interim solution until ERV installed—especially when outdoor temperature >15°F (smaller delta = less energy).
Trickle Vents: Continuous Low-Level Ventilation
Purpose-built ventilation with minimal heat loss.
What are trickle vents: Small openings (1/2″ × 8-12″) built into window frames or installed in walls providing 10-15 CFM continuous airflow.
Design features:
- Adjustable dampers: Close during extreme cold
- Insect screens: Prevent pest entry
- Sound baffles: Reduce outdoor noise infiltration
- Wind-activated: Self-regulating airflow based on pressure
Heat loss: Minimal—10 CFM continuous = 540 BTU/hr heating = ~$0.07/hour = $1.68/day = $50/month (comparable to strategic crack).
CO2 reduction:
2-person bedroom:
- Without ventilation: 2,500 ppm overnight
- With 10 CFM trickle vent: ~1,400-1,600 ppm overnight
- Improvement: 35-45% reduction—not optimal but significant
With 15 CFM trickle vent: ~1,200-1,400 ppm—approaching acceptable range.
Installation:
Window-frame vents: Installed in top of window frame—requires drilling.
- Cost: $20-60 per vent
- DIY installation possible
- Renter challenge: Requires landlord approval
Wall vents: Through-wall installation (similar to ERV but passive).
- Cost: $30-80 per vent
- Professional installation recommended
- More reversible than window-frame
Optimal use: Supplement to other strategies—trickle vents alone insufficient for 2-person bedroom but helpful combined with other measures.
Passive Stack Ventilation
Using building physics for natural ventilation.
Stack effect principle: Warm indoor air rises creating pressure at upper levels—driving air movement through building.
Apartment application:
Limitations: Most apartments lack vertical shaft from unit to roof—limiting pure passive stack effectiveness.
Hybrid approach: Combine bathroom exhaust (mechanical) with passive makeup air paths.
Implementation:
- Bathroom exhaust fan: Run continuously or intermittently (ASHRAE requirement)
- Passive supply: Trickle vents, door undercuts allow outdoor air drawn in by exhaust-created negative pressure
- Air pathway: Bedroom → Living area → Bathroom → Exhaust
Effectiveness:
With 50 CFM bathroom exhaust + adequate passive inlets:
- Whole apartment achieves ~0.3-0.4 ACH
- Bedroom CO2: ~1,200-1,500 ppm (better than sealed but not optimal)
Heat loss: Similar to exhaust-only ventilation—no heat recovery, but better distributed than single window opening.
Bathroom Exhaust Optimization
Maximizing existing systems.
ASHRAE requirement: Bathrooms need 50 CFM intermittent OR 20 CFM continuous exhaust.
Optimization for whole-apartment benefit:
Continuous operation: Run bathroom fan 24/7 at low speed (20-30 CFM) instead of high-speed intermittent.
Advantages:
- Provides baseline whole-unit ventilation
- Reduces bedroom CO2 somewhat (not optimal but improvement)
- Quieter continuous operation than intermittent high-speed
- Energy: 15W fan × 24hr = 360 Wh/day = $1.50/month
Makeup air requirement: Exhaust removes air—must enter somewhere.
Passive inlets needed:
- Trickle vents in bedrooms/living room
- Door undercuts (3/4-1″ gap under bedroom doors)
- Window cracks during shoulder seasons
Effectiveness:
20 CFM continuous exhaust:
- Studio apartment: Adequate—maintains <1,000 ppm
- 1BR: Marginal—bedroom may reach 1,200-1,500 ppm
- 2BR+: Insufficient—bedrooms exceed 1,500 ppm
Upgrade: Install higher-CFM quiet bathroom fan (40-50 CFM continuous capable).
- Cost: $80-200 fan + installation
- Performance: Significantly better whole-unit ventilation
Transfer Grilles and Door Undercutting
Enabling airflow with closed doors.
The problem: Closed bedroom door isolates bedroom from rest of apartment—bathroom exhaust cannot draw air from bedroom if door sealed.
Solution 1: Door Undercut
Implementation: Trim bedroom door leaving 3/4 to 1 inch gap between door bottom and floor.
Airflow: Allows ~5-15 CFM through gap (depending on pressure differential, gap size).
Cost: $50-150 (door trimming, reinstallation)
Advantage: Invisible, maintains privacy.
Limitation: Allows sound transfer, light infiltration.
Solution 2: Transfer Grille
Implementation: Install louvered grille (6″ × 12″ typical) in bedroom door.
Airflow: Provides ~10-25 CFM depending on grille size and pressure.
Cost: $15-50 grille + DIY installation
Advantage: Better airflow than undercut; adjustable louvers.
Limitation: Visible, reduces privacy, allows sound transfer.
Combined effect:
Bathroom exhaust 30 CFM + transfer grille: Bedroom CO2 reduces from 2,500 ppm (sealed door) → 1,400-1,700 ppm—meaningful improvement enabling bathroom exhaust to provide whole-apartment benefit.
The Temperature Perception vs Reality Gap
Why ventilation feels colder than measurements show.
Psychological factors:
Anticipated discomfort: Expectation that “opening window = cold” creates perception bias—feeling colder than actual temperature drop.
Air movement: Even small draft creates sensation of coolness via convective heat transfer from skin—feels 5°F colder than still air at same temperature.
Localized exposure: Standing near window experiences greatest cooling—extrapolating to whole apartment overestimates impact.
Measurement reality:
Whole-room temperature: Digital thermometer placed center of room, 4 feet high shows objective reality—2-4°F drop with 1-2″ crack.
Surface temperature: Floor, walls remain at higher temperature (thermal mass) even when air temperature drops slightly.
Time-averaged: Initial opening causes temporary dip—steady state within 20-30 minutes shows sustainable 2-4°F reduction with heating system compensating.
Comfort adaptation:
Additional blanket: One extra blanket compensates for 2-4°F drop—negligible comfort impact during sleep.
Programmable thermostat: Raise setpoint 2°F during window-crack periods—restores original temperature at minimal energy cost (heating additional 2°F cheaper than heating full 50°F outdoor air without recovery).
Combining Strategies for Optimal Results
Layering approaches for maximum effectiveness.
Apartment without ERV—Winter optimization:
Strategy stack:
- Bathroom exhaust continuous: 25 CFM baseline
- Bedroom door undercut/grille: Enable air circulation
- Trickle vents: 10-15 CFM passive supply
- Strategic window crack: Nights when outdoor >20°F, crack 1″ for 30-60 min before sleep
- Monitor CO2: Adjust based on measured levels
Expected outcome: Bedroom CO2 maintained 1,000-1,400 ppm—not perfect but vastly better than 2,500 ppm sealed condition.
Cost: ~$100-200 one-time (grilles, vents); ~$50-70/month energy
Apartment with ERV—Maximum performance:
ERV baseline: Continuous operation 40-60 CFM (ASHRAE 62.2 compliance)
Supplemental summer: Open windows during mild weather (spring/fall) providing free cooling when outdoor conditions favorable.
Monitoring: CO2 sensors verify system performance—maintain <1,000 ppm bedroom target.
Cost: $3,500-6,500 installation; ~$70-100/year operating; $300-500/year energy savings = net positive.
PuroAir 240
HEPA Air Purifier
Best for
Bedrooms, nurseries, small offices
PuroAir 400
HEPA 14 Air Purifier
Best for
Living rooms, mold & allergy sufferers
We may earn a small commission if you buy through these links — at no extra cost to you.
Climate-Specific Recommendations
Tailoring approach to location.
Cold-Dry Climates (Zones 6-7: Northern U.S., Canada):
Optimal: ERV (not HRV)—prevents winter desiccation recovering moisture per previous articles.
Efficiency target: ≥85% heat recovery—premium justified by high heating costs.
Interim strategy: Window cracking limited (<15°F outdoor)—too expensive. Rely on continuous bathroom exhaust + trickle vents.
Hot-Humid Climates (Zones 1-2: Southeast, Gulf Coast):
Winter ventilation: Not primary concern—mild outdoor temperatures make window opening feasible most winter days.
ERV benefit: Summer moisture blocking (previous articles) justifies installation—year-round value not just winter.
Mixed Climates (Zones 3-5: Mid-Atlantic, Midwest):
ERV value: Handles both cold-dry winters and warm-humid summers—optimal all-season solution.
Window strategy: Most effective—moderate winters allow frequent window cracking without extreme energy penalty.
Budget approach: Strategic window management winter + bathroom exhaust + trickle vents provides acceptable performance; ERV upgrade when finances allow.
Frequently Asked Questions
How can I reduce CO2 in my apartment without opening windows in winter?
Install ERV/HRV recovering 70-95% heat energy while providing continuous fresh air—reduces bedroom CO2 from 2,500 ppm to <1,000 ppm without energy penalty. Research confirms these systems “capture heat from outgoing air and transfer to incoming air, reducing heating load.” Cost: $3,500-6,500 installed; $70-100/year operating; $300-500/year energy savings (cold climates). Alternatives: Continuous bathroom exhaust (25-30 CFM) + trickle vents (10-15 CFM) + door transfer grilles reducing CO2 to 1,200-1,500 ppm at ~$50-70/month energy cost. Window cracking 1-2″ causes only 2-4°F drop while cutting CO2 65-75% at ~$45/month.
Does cracking a window in winter waste a lot of heat?
Surprisingly minimal with small opening. 1-2 inch crack provides substantial ventilation (15-25 CFM reducing CO2 from 2,500 ppm → 600-900 ppm per research) while causing only 2-4°F steady-state temperature drop in well-insulated apartment—not the perceived 10°F. Energy cost: ~$1.50/night (8 hours) = $45/month. Physics: Small opening limits cold air infiltration rate; room thermal mass and heating system easily compensate. Compare to ERV: $5.67/month operating cost providing whole-apartment ventilation with 85% heat recovery. Window cracking effective interim solution, especially when outdoor temperature >15°F.
Should I get HRV or ERV for winter apartment ventilation?
ERV strongly recommended for most apartments. Both recover heat (70-95% efficient), but ERV additionally recovers ~70% moisture preventing winter desiccation. Previous articles documented cold outdoor air (20°F, 60% RH) contains minimal absolute moisture—when heated to 70°F becomes 3% RH (bone dry) if using HRV. ERV recovers indoor humidity maintaining comfortable 35-45% RH. Exception: If apartment has chronic excess moisture (poor drainage, high occupancy), HRV’s moisture removal beneficial—but fix moisture source first. Research confirms “ERVs prevent over-drying indoor air during colder months” making them superior choice for winter apartment applications.
How much does it cost to run an ERV continuously in winter?
Operating cost: 30-80W fan power = 60W average × 24hr × 365 days = 526 kWh/year × $0.13/kWh = $68/year ($5.67/month) electricity. Energy savings: 85% efficient ERV in cold climate saves $300-500/year in heating costs (recovering heat from exhaust air). Net result: Positive—saves $230-430/year while providing 24/7 fresh air maintaining bedroom CO2 <1,000 ppm. Payback: Entry system ($1,500 installed) pays back in 3.5-6.5 years; premium system ($5,000 installed) in 10-15 years (faster in colder climates with higher heating costs). Comparison: Window cracking achieves similar CO2 reduction at $45/month vs ERV $5.67/month operating.
Can renters install ERV in apartment?
Window-mounted: Yes—completely removable, no landlord permission needed. Install ERV in custom window panel like AC unit—remove when moving. Cost: $800-2,000 equipment + DIY installation. Performance: 40-70 CFM adequate for bedroom CO2 control. Through-wall: Requires landlord approval (4-6″ hole in exterior wall) but reversible when moving (patch hole). Cost: $1,500-3,000 installed. Ducted whole-apartment: Requires landlord approval (invasive renovation). Best for owner-occupied condos. Alternative: Optimize existing systems—continuous bathroom exhaust + trickle vents + door grilles + strategic window cracking provides meaningful improvement without installation.