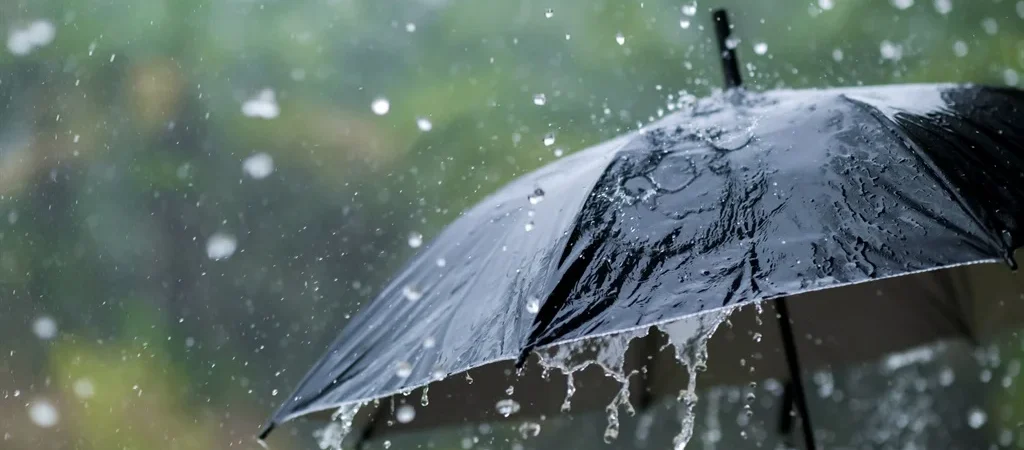
The storm finally passed. You survey the damage—fallen branches in the yard, leaves clogging the gutters—nothing unusual for a heavy downpour. But then you notice it: a dark, spreading patch on your living room wall, right below the window. By evening, the patch has grown. You touch it—the drywall feels damp, almost cold. The next morning, a musty smell permeates the room, and the paint has started bubbling. You’ve just entered a critical 72-hour window where your immediate actions will determine whether you face a simple drying-and-repair situation costing hundreds, or a catastrophic mold remediation and structural repair nightmare costing thousands.
Damp walls after heavy rain aren’t just annoying water stains—they’re your building screaming that its protective envelope has been compromised. This condition, technically called penetrating damp or rain penetration, affects an estimated 15-20% of UK homes and millions of properties worldwide. Unlike condensation (which forms from interior moisture) or rising damp (which ascends from ground moisture), penetrating damp results from exterior water breaching your walls, roof, or windows during rainfall. This comprehensive guide reveals the exact diagnostic steps to identify where rain is entering, the science behind why some walls dry while others develop permanent mold and structural damage, and the precise emergency protocol that must begin within 72 hours of rainfall.
Understanding Penetrating Damp: What Rain Does to Your Walls
Penetrating damp describes the horizontal or downward movement of water from the exterior of your building to interior surfaces. Unlike the upward capillary action of rising damp, penetrating damp enters through structural defects, material failures, or building envelope vulnerabilities that allow rainfall to breach what should be a weatherproof barrier.
The physics is straightforward but devastating: when wind-driven rain impacts an exterior wall, hydrostatic pressure forces water into any available opening—cracks in mortar, gaps around windows, deteriorated sealants, damaged flashing, or simply porous brick that’s lost its weather resistance. In properly constructed and maintained buildings, rain should run down exterior surfaces and drain away through gutters and proper grading. When damp walls appear after heavy rain, something in this protective system has failed.
The Saturation Timeline
Building materials respond to rain infiltration in predictable stages:
Hours 0-4 (Initial penetration): Water enters through defects and begins saturating porous materials. Brick, mortar, and concrete can absorb 5-15% of their weight in water. During this phase, exterior saturation may not yet be visible on interior surfaces.
Hours 4-12 (Migration through wall assembly): Water moves through the wall thickness via capillary action and gravity. Solid walls (single-wythe brick or stone) show interior dampness faster than cavity walls, where the air gap provides some buffer. Insulation materials, if present, absorb water like sponges, increasing both weight and moisture transfer.
Hours 12-24 (Interior surface manifestation): Damp patches appear on interior walls as water reaches the innermost surface. Paint or wallpaper may darken. Plaster feels cool and damp to touch. This is when most homeowners first notice the problem—but by this point, building materials have been saturated for potentially 24 hours.
Hours 24-72 (Critical mold germination window): If materials remain damp beyond 48-72 hours, mold spores begin germinating. Initial growth is microscopic and invisible, but the biological colonization process has begun. Materials that dry within this window typically escape mold growth; those that remain wet beyond 72 hours almost certainly develop hidden mold colonies.
Beyond 72 hours (Permanent damage zone): Drywall paper backing, wood framing, insulation, and other porous materials develop established mold growth. Paint and plaster deteriorate. Structural wood can begin softening from water saturation. At this stage, simple drying is insufficient—contaminated materials require removal and replacement.
Pro-Tip: The critical difference between a manageable incident and a remediation disaster is action within that 72-hour window. If you discover damp walls after heavy rain, you’re not dealing with a “”when convenient”” situation—the countdown has already started, and materials have been wet for an unknown period before you noticed the interior symptoms.
The Critical 72-Hour Window: Why Timing Determines Everything
Building science research establishes 24-48 hours as the timeframe to dry materials before mold growth begins. However, for damp walls after heavy rain, we extend this to 72 hours for several practical reasons:
Discovery delay: You typically notice interior damp patches 12-24 hours after rain stops, meaning materials have already been wet for a full day. The 72-hour window accounts for this discovery lag.
Drying time variability: Different materials and thicknesses require different drying times. A slightly damp 1/2-inch drywall surface might dry in 24 hours, while saturated 8-inch stone walls might need 48-72 hours of active drying to reach safe moisture levels.
Weather dependence: If rain continues or humidity remains high after the storm, natural drying slows dramatically. The 72-hour countdown gives you time to deploy mechanical drying even in unfavorable conditions.
What Happens If You Miss the Window
Scenario 1: Drying within 72 hours
- Materials return to equilibrium moisture content (typically 8-15% for wood, <1% for drywall)
- No mold growth occurs
- Surface cleaning and minor cosmetic repairs sufficient
- Total cost: $0-500 for dehumidifier rental/purchase and minor paint touch-up
Scenario 2: Drying at 72-96 hours
- Borderline situation; mold germination may have begun
- Thorough antimicrobial treatment necessary
- Materials should be moisture-tested; anything above 20% moisture content replaced
- Total cost: $500-2,000 for treatment and selective material replacement
Scenario 3: Addressing problem after 96+ hours
- Established mold growth behind surfaces
- Porous materials (drywall, insulation) require removal and replacement
- Professional remediation necessary to prevent spore dispersal
- Total cost: $2,000-10,000+ depending on extent
The financial progression is exponential, not linear. A $50 dehumidifier deployed within 24 hours prevents damage that costs thousands to remediate at day 5.
Emergency Diagnostic Protocol: Finding the Water Entry Point
When you discover damp walls after heavy rain, resist the temptation to simply dry the visible dampness and move on. Without identifying and fixing the entry point, rain will return with the next storm, and cumulative water damage will worsen each cycle.
Step 1: Document Current Conditions (First 30 Minutes)
Before any remediation:
Photograph everything: Take clear, dated photos of all damp patches from multiple angles. Include wide shots showing location in room and close-ups showing texture and extent. This documentation protects you legally (landlord/insurance claims) and provides baseline for monitoring.
Map the pattern: Note which walls are affected, distance from floor, relationship to windows/doors, height of dampness. Draw a simple floor plan marking affected areas.
Measure moisture: If you have a moisture meter (pin-type or pinless), take readings at multiple points. Record percentages. If no meter available, note subjective dampness: “”slightly damp,”” “”very wet,”” “”dripping.””
Test surfaces: Press firmly on drywall; does it feel soft or spongy? This indicates severe saturation requiring removal. Paint bubbling or peeling? This shows water trapped behind the finish.
Step 2: Trace Water to Entry Point (Hours 1-4)
Exterior inspection from inside: Start at the highest point of interior dampness and work up. Water enters high and runs down inside walls, so interior dampness at window level might come from roof defects 10 feet higher.
Key principle: Water follows gravity and paths of least resistance. If dampness appears on an interior wall 4 feet from floor, water entered somewhere above that level—typically at roof/wall junction, around windows, through cracks, or from gutter overflow.
Common tracking patterns:
- Damp patch centered below window → Check window sill drip edge, window seals, or cracks in window frame
- Dampness at wall/ceiling corner → Check roof flashing, gutter overflow, or roof damage
- Dampness spreading from mid-wall → Check exterior cracks in brickwork or failed mortar joints at that level
- Dampness along entire exterior wall → Saturated porous brickwork without adequate weather protection
Step 3: Exterior Investigation (Hours 4-24)
Safety first: Only conduct exterior inspection if you can do so safely. Roofs and tall ladders during post-storm conditions are dangerous. When in doubt, hire professionals.
Systematic roof-to-ground inspection:
Roof level:
- Missing, damaged, or lifted shingles/tiles
- Cracked or missing flashing (around chimneys, vents, valleys)
- Degraded roof penetration seals (vent boots, skylights)
- Ridge cap damage
Gutter level:
- Gutters overflowing or backing up (debris blockage)
- Gutter pulling away from fascia
- Downspout disconnected or draining into wall instead of away
- Missing gutter sections
Wall level:
- Cracks in render, stucco, or brick
- Deteriorated mortar joints (repointing needed)
- Gaps around windows or doors
- Failed caulking/sealants
- Damaged window sills without proper drip edges
- Water staining patterns on exterior showing water path
Ground level:
- Ground sloping toward foundation instead of away
- Soil buildup against walls (bridging damp-proof course)
- Blocked drainage channels
- Splash-back from improperly directed downspouts
Pro-Tip: Rain penetration often results from multiple compounding failures. For instance, a partially blocked gutter causes overflow, which saturates a section of wall, which then penetrates inward through a minor crack that would normally handle typical moisture loads. Fixing just the crack without addressing the gutter leaves the underlying problem.
Common Rain Penetration Points in Buildings
Understanding where rain typically breaches building envelopes helps you target inspection efforts efficiently.
Windows and Doors: The Primary Culprits
Windows represent the #1 penetrating damp source in most buildings. Every window installation creates multiple potential water entry points:
Window sills: Properly designed sills have drip edges (small grooves on the underside) that break water tension, forcing rainwater to drip away from the wall rather than run back underneath. Damaged, cracked, or poorly designed sills without drip edges direct water directly onto walls below.
Window frame perimeter: The gap between window frame and rough opening should be sealed with proper flashing and backing rod with sealant. In older installations or DIY work, this critical seal often fails, allowing water to penetrate around the entire frame perimeter.
Failed glazing seals: Double-pane windows with seal failures don’t just fog up—they can leak water during driving rain. The weep holes meant to drain accumulation can back up, causing overflow into walls.
Improper installation slope: Windows should be installed with a slight outward slope (2-5 degrees) to encourage drainage outward. Level or backwards-sloping installations accumulate water that eventually finds interior pathways.
Roof and Flashing Failures
Flashing is thin material (typically metal or rubberized membrane) installed at roof transitions to direct water away from vulnerable junctions. Flashing failures are incredibly common:
Chimney flashing: The junction between vertical chimney and sloped roof is highly vulnerable. Step flashing (metal pieces weaving between shingles and up chimney sides) must be properly installed and sealed. Deteriorated chimney flashing causes water to run down inside walls adjacent to chimneys.
Valley flashing: Where two roof planes meet at a valley, enormous volumes of water concentrate during rain. Undersized, improperly overlapped, or corroded valley flashing creates direct pathways for water to enter roof deck and saturate ceilings below.
Wall/roof junctions: Where vertical walls meet roofing (dormers, split-level transitions), step flashing and kickout flashings must direct water away from the wall and into gutters. Missing or improperly installed kickout flashing causes water to run down behind siding and into wall cavities.
Penetrations: Every pipe, vent, exhaust fan, or chimney penetrating the roof requires a watertight boot or flashing assembly. These rubber boots deteriorate in UV exposure after 10-15 years, creating reliable leak sources.
Gutter and Drainage System Overwhelm
Properly functioning gutters and downspouts move enormous water volumes away from building envelopes. Failure modes include:
Undersized gutters: Many older homes have 4-inch gutters inadequate for roof areas and modern rainfall intensity. During heavy rain, undersized gutters overflow, pouring water directly onto walls.
Insufficient downspouts: Gutters need downspouts every 30-40 feet of run. Inadequate downspout density causes gutter overtopping during peak flow.
Clogged gutters/downspouts: Leaves, roof granules, and debris accumulate, blocking flow. Water backs up, overflows, and saturates walls and fascia.
Improper downspout termination: Downspouts must discharge at least 6 feet from foundations. Short downspout extensions or downspouts dumping directly at foundation walls cause localized saturation and penetrating damp at ground level.
Missing splash blocks: Where downspouts discharge, splash blocks or underground drainage pipes should carry water far from the building. Without these, discharged water immediately soaks back into nearby walls.
Masonry Deterioration
Building materials themselves can fail, transforming from water-resistant to water-permeable:
Spalling brick: Freeze-thaw cycles cause face layer of brick to separate and fall away, exposing porous interior brick core that absorbs water readily.
Failed mortar joints: Mortar has 20-30 year service life before requiring repointing. Deteriorated joints allow water to penetrate deep into wall assemblies.
Porous older brick: Historical brick often has higher porosity than modern materials. Without proper weather protection (render, sealants, breathable waterproof coatings), old brick acts like a sponge during prolonged rain.
Saturated cavity walls: Modern cavity wall construction includes an air gap between exterior and interior wythe. When cavity becomes saturated—from defects in exterior wythe, wall ties conducting water across the gap, or improperly installed cavity insulation—the protective gap becomes a water distribution highway, spreading dampness across wide wall areas.
Penetrating Damp vs. Rising Damp vs. Condensation: Definitive Diagnosis
Damp walls after heavy rain could theoretically result from three different moisture sources. Accurate diagnosis is essential because treatment differs completely.
Comparison Table: Diagnosing Damp Types
| Factor | Penetrating Damp | Rising Damp | Condensation |
|---|---|---|---|
| Primary Cause | Rain entering through building envelope defects | Ground moisture rising through walls via capillary action | Indoor moisture condensing on cold surfaces |
| Timing Pattern | Appears during or within 12-48 hours after rain | Constant year-round, worse in wet seasons | Worst during temperature differentials (winter mornings, post-shower) |
| Location Pattern | Anywhere on building; patches correspond to defects | Only on ground-floor walls, never above ~1.5m height | Cold surfaces: windows, exterior walls, corners, thermal bridges |
| Height from Floor | Any height—can be ceiling-level, mid-wall, or low | Always starts at floor level, maximum 1-1.5m height | Any height but concentrated where surface temperature is coldest |
| Appearance | Irregular patches, often darker at center; may spread with repeated rain | Horizontal “”tide mark”” at top of dampness; white salt deposits (efflorescence) | Uniform coverage on cold surfaces; water droplets; no salt deposits |
| Exterior Correlation | Corresponds to exterior defects: above cracks, below gutters, under windows | No exterior correlation; problem is below-ground DPC failure | No exterior correlation; internal humidity problem |
| Seasonal Variation | Worse during rainy seasons, may disappear during dry weather | Relatively constant, slight seasonal variation | Worse in winter (heating season) or humid summer |
| Touch/Feel | Damp patches cold to touch; may feel soft if saturated | Damp with gritty salt deposits; plaster may be damaged | Surface damp that dries quickly when wiped; re-forms if humidity not controlled |
| Structural Indicators | Paint bubbling, plaster staining, mold growth near patches | Deteriorating skirting boards at floor level, damaged plaster, salt staining | No structural damage; purely surface moisture |
| Moisture Meter Reading | Elevated readings (20%+) localized to affected patches | Elevated readings (20%+) in bottom 1m of wall, decreasing with height | Surface moisture only; deep readings normal unless prolonged condensation |
| Fix Approach | Repair exterior defects (gutters, flashing, cracks, sills) | Install/repair damp-proof course, manage ground moisture | Control indoor humidity, improve ventilation, increase surface temperatures |
Diagnostic Decision Tree
Question 1: Did dampness appear during or within 48 hours of heavy rain?
- YES → Likely penetrating damp, continue to Question 2
- NO → Check Questions 3-4
Question 2: Is dampness on an exterior wall, ceiling, or anywhere above 1.5m from floor?
- YES → Almost certainly penetrating damp
- NO → Could be penetrating damp OR rising damp, continue to Question 3
Question 3: Does dampness show horizontal “”tide mark”” at ~1m height with white crusty deposits?
- YES → Almost certainly rising damp (failed DPC)
- NO → Check Question 4
Question 4: Does dampness appear on windows, corners, or cold surfaces regardless of weather?
- YES → Likely condensation
- NO → Return to penetrating damp investigation
Pro-Tip: Many buildings suffer from multiple simultaneous damp problems. Ground-floor rooms might have both rising damp (tide marks at 1m) AND penetrating damp (patches higher on wall from roof leaks). Successful remediation requires addressing all moisture sources.
The Science of Rain-Saturated Walls and Mold Growth
Understanding what happens inside walls after rain penetration reveals why timing and thoroughness matter so critically.
Material Moisture Dynamics
Different building materials respond to saturation uniquely:
Gypsum drywall (most common interior wall finish):
- Absorbs water rapidly through paper facing
- Core can hold significant moisture without visible exterior dampness
- Critical moisture threshold: >1% water content by weight triggers mold growth on paper backing
- Drying time: 24-48 hours with active airflow for minor dampness; 48-72+ hours for saturation
- Point of no return: If drywall remains above 20% moisture content for 48+ hours, mold colonizes paper backing; drying afterward doesn’t eliminate established growth—material must be replaced
Brick and masonry:
- Can absorb 5-15% of weight in water
- Individual bricks dry slowly (several days to weeks)
- However, brick is inorganic—mold won’t grow on brick itself
- Danger: Moisture-saturated brick dries by evaporating toward interior and exterior; interior-facing moisture saturates adjoining drywall, insulation, or plaster
Wood framing:
- Safe moisture content: 8-15%
- At 20%+ moisture content, wood rot fungi can activate
- Requires sustained saturation (weeks) before structural damage occurs
- Concern: Wood in wall cavities hidden from view; saturation may go unnoticed until rot advanced
Insulation:
- Fiberglass: Absorbs water readily, loses all R-value when wet, holds moisture indefinitely, becomes mold incubator
- Cellulose: Absorbs water, becomes heavy, sags, grows mold
- Foam board: Doesn’t absorb moisture but doesn’t dry out wet cavities either
- Critical: Saturated insulation in wall cavities must be removed—it will not dry effectively and guarantees mold growth
Mold Biology in Rain-Damaged Walls
Mold growth following damp walls after heavy rain follows predictable biology:
Spore presence: Mold spores exist everywhere—in outdoor air, on materials, dormant and waiting for moisture.
Germination requirements:
- Moisture: Surface relative humidity >80% for 12-24 hours
- Temperature: 40-90°F (most indoor environments qualify)
- Oxygen: Always present
- Food source: Cellulose (paper drywall facing, wood), dust, organic compounds in paint
Timeline:
- 0-24 hours: Spores absorb moisture, begin swelling
- 24-48 hours: Hyphae (root-like structures) emerge, penetrating substrate
- 48-96 hours: Mycelium network established, exponential growth begins
- 4-7 days: Fruiting bodies develop, releasing millions of new spores
Why hidden mold is worse: When mold grows on visible surfaces, you detect it quickly via visual observation or odor. When mold grows inside wall cavities, behind drywall, or in saturated insulation, months can pass before discovery. During this time, mold colonies expand extensively, contaminate HVAC systems through wall penetrations, and create serious indoor air quality problems.
Health implications: Mold in rain-damaged walls releases:
- Spores: Inhaled into lungs, triggering allergic reactions, asthma
- MVOCs: Volatile organic compounds creating characteristic musty odor; some cause neurological symptoms
- Mycotoxins: Toxic compounds produced by certain species (Stachybotrys, Aspergillus); prolonged exposure linked to serious health effects
Immediate Actions: The First 72 Hours After Rain
When you discover damp walls after heavy rain, follow this hour-by-hour protocol to prevent permanent damage.
Hours 0-4: Emergency Containment
1. Stop ongoing water intrusion If rain is still falling and you’ve identified the entry point:
- Place buckets or tarps to catch dripping water
- Temporary patch obvious roof damage with tarps weighted down
- Redirect gutter overflow with temporary extensions
- Block water from entering around windows/doors with towels
2. Remove standing water
- Use wet/dry vacuum for any pooled water on floors or windowsills
- Extract as much moisture as possible from carpets if affected
- Wring out saturated drapes, rugs, or fabric items
3. Deploy immediate drying
- Open windows if outdoor humidity is lower than indoor (check weather data for dew point)
- Position fans to create airflow across damp wall surfaces
- Move furniture away from affected walls (minimum 12 inches)
- Remove items stored against damp walls (boxes, clothing, furniture)
- Pull back carpet edges if floor-level dampness present
4. Document conditions
- Take comprehensive photos and videos
- Measure moisture if meter available
- Note time of discovery, extent of dampness
- Record outdoor conditions (temperature, humidity, ongoing rain)
Hours 4-24: Active Drying Phase 1
1. Deploy dehumidifiers If you own or can quickly acquire dehumidifiers:
- Place in affected rooms, sized appropriately (see capacity guidelines below)
- Close windows and doors to create dehumidification zone
- Target 40-50% relative humidity
- Empty collection buckets every 4-6 hours
Dehumidifier sizing for rain-damaged rooms:
- Small room (<500 sq ft) with moderate dampness: 30-40 pint capacity
- Medium room (500-1500 sq ft) with significant dampness: 50-70 pint capacity
- Large room or multiple rooms: 70+ pint capacity OR multiple units
2. Increase air circulation aggressively
- Run multiple fans continuously
- Position fans to move air along wall surfaces
- Create air circulation pathways through doorways
- Consider renting commercial air movers for severe situations
3. Apply gentle heat
- Increase thermostat 2-3 degrees to speed evaporation
- Space heaters can help but maintain safe distances from damp materials
- Avoid excessive heat that could damage materials or create safety hazards
4. Monitor progress
- Check affected areas every 4-6 hours
- Touch walls to assess if feeling less damp
- Moisture meter readings should decrease steadily
- Document changes with photos
Hours 24-72: Active Drying Phase 2 and Assessment
1. Verify drying progress At 24-hour mark, significant improvement should be visible:
- Damp patches should be shrinking
- Surface should feel less wet to touch
- Moisture meter readings declining
- No new areas of dampness appearing
If drying is progressing normally:
- Continue dehumidification and air circulation
- Monitor until moisture levels reach normal ranges (wood <15%, drywall <1%)
- Begin planning permanent repairs to prevent recurrence
If dampness persists or worsens:
- Hidden water source remains active
- Materials too saturated for current drying capacity
- Professional assessment and equipment necessary
2. Make penetration decisions At 48-72 hours, you must decide if hidden investigation is necessary:
Remove drywall if:
- Wall still feels saturated after 48 hours of active drying
- Moisture meter shows >20% in drywall
- Wall feels soft, spongy, or shows structural deterioration
- Musty odor present despite surface drying
- Wall cavities likely saturated (insulation, framing)
Can likely continue drying if:
- Steady progress toward dryness
- Moisture readings declining
- No structural softening
- No musty odor
- Confidence that only surface dampness, not cavity saturation
3. Antimicrobial treatment For surfaces that were damp 48+ hours:
- After complete drying, clean with antimicrobial solution
- Products: Concrobium, dilute bleach (1 cup per gallon water), hydrogen peroxide
- Allow surface to dry thoroughly post-treatment
- Do NOT apply antimicrobials to still-damp surfaces (dilutes product, prevents penetration)
Post-72-Hour Actions
If materials dried successfully:
- Monitor for next 2-4 weeks for any recurring dampness
- Smell for musty odors indicating hidden mold
- Watch for paint discoloration, bubbling
- Schedule permanent repairs to water entry points
If mold discovered or suspected:
- Small surface mold (<10 sq ft): Can potentially clean yourself with proper PPE
- Mold in wall cavities or >10 sq ft: Professional remediation required
- Always assume hidden mold is more extensive than visible signs suggest
Long-Term Repairs: Stopping Rain Penetration Permanently
Emergency drying addresses symptoms. Permanent solutions require fixing the building defects that allowed rain penetration.
Roof and Flashing Repairs
Professional reroofing ($5,000-15,000+): For widespread shingle damage, aging roofs, or multiple penetration points, complete roof replacement may be necessary. This includes:
- New underlayment and ice/water shield
- New shingles/tiles with proper installation
- All flashing replaced (valleys, chimneys, walls, penetrations)
- Proper ventilation installed
Flashing repair/replacement ($500-3,000): Targeted flashing work addresses specific leak sources:
- Chimney flashing restoration
- Valley flashing replacement
- Kickout flashing installation at wall/roof junctions
- Pipe boot replacement
Roof sealant/minor repair ($200-800): For isolated small defects:
- Replace individual damaged shingles
- Seal minor flashing gaps with appropriate sealants
- Repair pipe boots
Pro-Tip: Roof sealants are temporary fixes (1-3 year lifespan). Use only as emergency repairs pending proper replacement.
Gutter System Upgrades
Gutter cleaning ($100-300): Professional cleaning removes all debris, ensures proper pitch, checks for damage.
Gutter replacement/upgrade ($800-2,500):
- Upgrade from 4″” to 5″” or 6″” gutters for better capacity
- Replace damaged gutter sections
- Install gutter guards to prevent future clogging
Downspout extensions ($50-300):
- Extend all downspouts minimum 6 feet from foundation
- Install underground drainage pipes if surface extensions impractical
- Add splash blocks at discharge points
Additional downspouts ($100-400 per downspout): Add downspouts to reduce gutter run length and improve drainage.
Window and Door Weatherproofing
Sealant replacement ($200-800):
- Remove old deteriorated caulking around windows and doors
- Apply new flexible polyurethane or hybrid sealant
- Ensure backer rod used for gaps >1/4 inch
Window sill repair/replacement ($300-1,500 per window):
- Replace damaged sills with proper drip edges
- Add or repair drip edge grooves
- Ensure proper slope away from building
Flashing installation ($500-2,000): For windows lacking proper flashing:
- Install self-adhering flashing membrane
- Add metal head flashing above windows
- Properly integrate with weather-resistant barrier
Window replacement ($300-1,000+ per window): For severely damaged or improperly installed windows, replacement is often more cost-effective than endless repair attempts.
Masonry Repairs
Repointing ($5-25 per square foot): Remove deteriorated mortar to proper depth (3/4-1 inch), repoint with appropriate mortar type matching existing:
- Type N mortar for most residential work
- Type O for soft historic brick
- Never use Type S or M (too hard, damages brick)
Brick replacement ($200-1,000+ depending on extent): Replace spalled or damaged brick with matching units, properly integrated into existing wall.
Masonry sealer/waterproofing ($1-5 per square foot):
- Breathable silane/siloxane sealers penetrate brick, repel water while allowing vapor transmission
- Never use film-forming sealers (paint, acrylic sealers)—trap moisture inside walls
- Reapplication every 5-10 years
Rendering/stucco repair ($3-10 per square foot): For damaged render or stucco:
- Remove loose or damaged sections
- Repair substrate
- Apply new render in proper layers
- Finish to match existing texture
Cavity Wall Repairs
Cavity tray installation ($1,500-5,000): In cavity walls with chronic saturation, install cavity trays to direct water outward through weep holes.
Cavity insulation replacement: If cavity insulation has become saturated or degraded, it must be removed and replaced with appropriate material.
Wall tie replacement ($2,000-8,000): Corroded wall ties can conduct water across cavity. Replacement involves:
- Identifying failing ties through wall inspection
- Installing new stainless steel ties
- Removing or isolating old ties
When Professional Assessment Becomes Mandatory
Certain situations exceed DIY diagnosis and repair capabilities:
1. Recurring dampness after repairs If you’ve attempted fixes but dampness reappears with next rain, hidden defects exist requiring professional investigation.
2. Widespread or severe penetration Multiple rooms affected, large areas of dampness, or ceilings showing damage suggest significant structural problems.
3. Historic or unusual construction Solid stone walls, historic buildings, unusual construction methods require specialist knowledge.
4. Structural concerns Soft or deteriorating drywall, sagging ceiling, visible mold growth, or musty odors mandate professional assessment.
5. Insurance claims Document with professional reports to support claims.
Professional services available:
Damp surveyor/specialist ($300-800 for survey):
- Comprehensive property inspection
- Moisture mapping with professional meters
- Thermal imaging to identify hidden moisture
- Written report with repair specifications
- Often includes guarantee when repairs done by same company
Roofing contractor ($100-300 for inspection):
- Comprehensive roof assessment
- Identify all defects and damage
- Cost estimates for repairs
- Emergency repair capability
Structural engineer ($500-2,000 for assessment):
- Evaluate structural damage from prolonged dampness
- Assess load-bearing capacity of water-damaged framing
- Provide repair specifications
- Required for significant structural work
Special Cases: Basements, Solid Walls, and Historic Buildings
Basement Penetrating Damp
Basements face unique challenges—below-grade walls directly contact soil, creating enormous moisture pressure during rain.
Hydrostatic pressure: Water-saturated soil pushes moisture through foundation walls, cracks, and floor/wall joints. This pressure can exceed the strength of waterproofing systems.
Solutions:
Exterior waterproofing ($10,000-30,000):
- Excavate around foundation
- Apply waterproof membrane to exterior
- Install drainage system at footing level
- Backfill with drainage stone
Interior solutions ($3,000-10,000):
- Interior drainage system (weeping tile at perimeter)
- Sump pump installation
- Dehumidification
- Waterproof interior coatings (temporary measure only)
Grading improvement ($500-3,000): Ensure ground slopes away from foundation minimum 6 inches over 10 feet.
Solid Wall Buildings
Buildings constructed before ~1920 typically have solid walls (no cavity) presenting different challenges:
Characteristics:
- Single wythe of brick or stone, 9-12 inches thick
- No cavity to prevent water migration
- Water penetrates through entire wall thickness directly to interior
- High thermal bridging increases condensation risk
Solutions:
- External render or cladding adds weather protection
- Breathable lime-based repairs maintain vapor permeability
- Internal insulation (with careful vapor barrier consideration)
- Never seal with impermeable coatings—traps moisture
Historic Buildings
Listed buildings and conservation areas:
- Repairs must use appropriate traditional materials
- Consent required for changes
- Specialist contractors necessary
Lime mortar vs. cement: Historic buildings require lime mortar (softer, more vapor-permeable). Cement repointing damages soft historic brick.
Breathability essential: Historic construction relied on materials’ ability to absorb and release moisture. Modern impermeable materials trap moisture, accelerating decay.
Comparison Table: DIY vs. Professional Rain Penetration Repair
| Factor | DIY Approach | Professional Remediation |
|---|---|---|
| Suitable For | Minor isolated dampness, obvious defects (clogged gutter, simple crack), confident diagnosis | Recurring problems, widespread damage, hidden defects, structural concerns, insurance claims |
| Cost | $50-1,000 (materials, rental equipment, sealants) | $500-30,000+ (depends on extent—surveys $300-800, repairs $1,000-15,000+) |
| Time Required | 1-7 days (drying, minor repairs) | 1-6 weeks (assessment, scheduling, comprehensive repairs) |
| Equipment Needed | Dehumidifier, fans, moisture meter, basic tools, sealants, ladders | Industrial drying equipment, thermal imaging, professional-grade meters, scaffolding, specialized tools |
| Diagnosis Accuracy | Limited—based on visible signs, basic understanding | High—trained specialists, diagnostic tools, experience pattern recognition |
| Warranty/Guarantee | None—DIY at your own risk | Typically 5-20 year guarantee on repairs; written specifications |
| Hidden Damage Detection | Difficult—limited tools and access | Professional—thermal imaging, invasive investigation, cavity inspection |
| Insurance Documentation | Informal photos, limited evidence | Professional reports, before/after documentation, repair specifications accepted by insurers |
| Complexity Handling | Simple defects only—complex issues like cavity wall problems, structural damage beyond capability | All complexity levels—structural repairs, historic buildings, cavity work, comprehensive failures |
| Best Scenarios | Clogged gutter, simple window sealant failure, minor crack, first-time dampness after identifying obvious cause | Persistent dampness despite DIY attempts, extensive damage, multiple water entry points, property sale/purchase, insurance claim |
Rain Penetration Demands Immediate, Thorough Response
Damp walls after heavy rain aren’t simply cosmetic annoyances or minor inconveniences to address “”when you get around to it.”” They’re emergency alerts that your building’s protective envelope has been breached, and a 72-hour countdown to potential permanent damage has begun. The difference between a $100 repair and a $10,000 remediation catastrophe often comes down to action speed and thoroughness in those critical first three days.
The homeowners who successfully manage rain penetration follow a consistent pattern:
Immediate recognition: They understand that damp walls = emergency requiring same-day response
Systematic diagnosis: They methodically trace dampness to actual water entry points rather than simply treating visible symptoms
Aggressive drying: They deploy proper equipment within 24 hours and maintain drying until materials reach safe moisture levels
Permanent repairs: They fix underlying defects—gutters, flashing, cracks, windows—not just patch visible damage
Ongoing monitoring: They remain vigilant through subsequent rainstorms to verify repairs successful
Your action framework:
Hour 0: Document everything—photos, measurements, observations
Hours 0-4: Stop ongoing water entry, remove standing water, deploy emergency drying
Hours 4-24: Trace to entry point, deploy dehumidifiers, increase air circulation, monitor progress
Hours 24-72: Assess drying effectiveness, make penetration decisions if necessary, plan permanent repairs
Week 2+: Execute permanent repairs to building defects, monitor through next rain event
Remember the 72-hour window. Materials that dry within this timeframe almost never develop permanent mold damage. Materials that remain damp beyond 72 hours almost certainly require replacement, transforming a $200 dehumidifier rental into a $5,000+ remediation project.
Your building is speaking to you through those damp patches. Listen carefully. Respond immediately. Act thoroughly. The alternative—delayed response, partial fixes, ignored warning signs—leads inevitably to the horror stories of mold-contaminated homes, failed insurance claims, and collapsed property values.
Take action today. That damp patch isn’t going to fix itself, and the next rain is already on the forecast. Your 72-hour window starts now.
Frequently Asked Questions
How can I tell if damp walls after heavy rain are serious or just surface moisture that will dry on its own?
The key indicators of serious penetrating damp requiring immediate action are: (1) dampness persisting more than 24 hours after rain stops despite adequate ventilation, (2) dampness spreading rather than shrinking over time, (3) walls feeling cold and damp deep within the material (not just surface moisture), (4) musty odors developing within 48-72 hours, and (5) recurring dampness in the same location with each significant rain event. Surface condensation from humidity dries within hours once rain stops and humidity drops. Penetrating damp from actual water intrusion remains for days and worsens with subsequent rain until the entry point is fixed. If in doubt, assume serious and begin active drying immediately—better to over-respond than under-respond.
Is it safe to live in a house with damp walls after rain, or should I move out temporarily?
For minor to moderate penetrating damp affecting limited areas (one room, small patches), temporary relocation is usually unnecessary if you begin immediate drying and no mold develops. However, consider temporary relocation if: (1) extensive dampness affecting multiple rooms or large areas (>50 square feet), (2) musty odors indicating mold growth have developed, (3) occupants with asthma, allergies, or immune compromise experience worsening symptoms, (4) children under 2 or elderly individuals live in affected areas, or (5) professional remediation requiring material removal and antimicrobial treatment becomes necessary. The primary health concern is mold exposure—if materials dry within 72 hours before mold establishes, health risks are minimal. Once mold grows extensively, particularly in wall cavities releasing spores into breathing air, temporary relocation during remediation may be advisable.
Will damp walls after rain cause permanent damage to my house, or can they be fully repaired?
If dried within 72 hours and water entry point repaired, most penetrating damp causes no permanent damage—materials return to normal moisture levels, no mold grows, and only cosmetic repairs (paint touch-up) are needed. However, permanent damage occurs when: (1) drywall remains saturated beyond 48-72 hours, causing mold colonization of paper backing requiring complete replacement, (2) structural wood framing remains wet for weeks to months, causing wood rot requiring expensive structural repairs, (3) insulation becomes saturated and compressed, losing R-value permanently and requiring replacement, or (4) repeated rain penetration cycles over years cause cumulative deterioration of plaster, mortar, and structural elements. The critical factor is response speed—immediate drying prevents permanent damage; delayed response guarantees it. Even severe initial dampness can be fully remediated if dried quickly and repairs executed properly.
Can I just paint over damp walls after rain to cover the stains, or do I need to do something else first?
Never paint over damp walls—this creates three serious problems: (1) Paint won’t adhere to damp surfaces and will bubble, peel, or fail within days to weeks, wasting time and money; (2) Trapping moisture behind paint prevents proper drying, guaranteeing mold growth in trapped moisture layer; and (3) Covering stains without fixing water entry point means dampness will return with next rain, appearing through new paint and worsening underlying damage. The correct sequence is: (1) Identify and repair water entry point (gutter, crack, flashing, etc.); (2) Dry affected materials completely—moisture meter readings below 15% for wood, below 1% for drywall; (3) Clean dried surfaces with antimicrobial solution if dampness exceeded 48 hours; (4) Allow 1-2 weeks after complete drying before painting; (5) Apply stain-blocking primer (shellac-based like BIN or oil-based like Kilz) before finish paint. If you don’t fix the entry point first, you’re painting over a recurring problem.
How much does it typically cost to fix damp walls after heavy rain, and will insurance cover it?
Costs vary enormously based on extent and cause. DIY drying (dehumidifier purchase $200-400, fans $50-100) for minor dampness caught early can be under $500 total. Professional drying services run $1,000-3,000. Simple repairs like gutter cleaning ($100-300), resealing windows ($200-500), or fixing minor roof damage ($500-2,000) are relatively affordable. Major repairs like roof replacement ($5,000-15,000), extensive repointing ($3,000-10,000), or foundation waterproofing ($10,000-30,000) are expensive. Mold remediation adds $1,500-10,000+ depending on extent. Insurance coverage depends on your policy and cause. Sudden, accidental damage (storm damage to roof causing leaks) is typically covered. Gradual deterioration from maintenance neglect (old gutters never cleaned, deteriorated sealants never replaced) is typically excluded. Key strategy: Document everything immediately, take action within 72 hours to minimize damage, get professional assessment with written report for insurance claims, and understand that prevention through maintenance is far cheaper than post-damage repairs.