
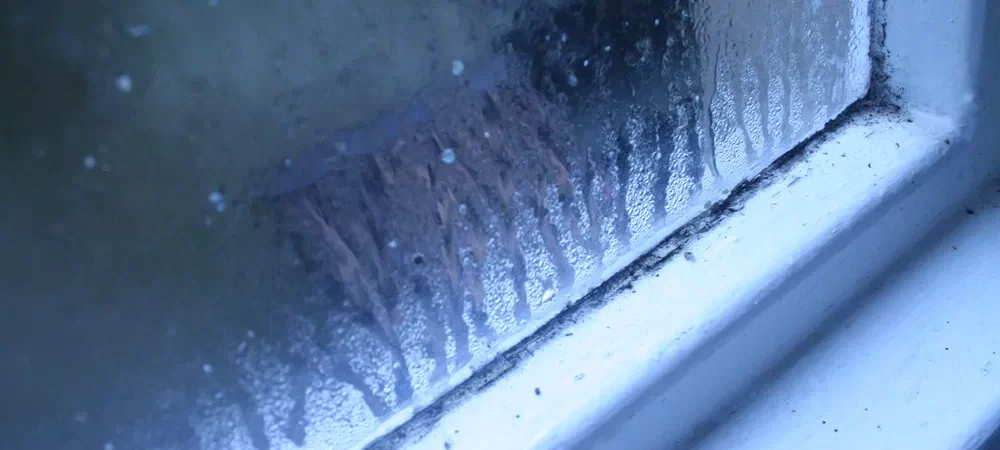
Your walls can be rotting from the inside out right now, and you’d have no idea — because condensation damage almost never announces itself with visible mold until it’s already a serious structural problem. That’s the part most homeowners miss entirely. They check for dark spots, sniff for musty smells, and when they find nothing, they assume they’re fine. They’re often not.
The real danger with condensation without visible mold isn’t the mold itself — it’s the months or years of silent moisture accumulation that happens before mold ever shows up on a surface you can see. Wood framing softens, insulation compresses and loses R-value, drywall paper degrades, and metal fasteners corrode, all behind your walls, completely invisible. By the time mold appears on the interior surface, the damage behind it can already be extensive.
This article is built around that gap: what’s actually happening inside your walls before the warning signs you know to look for ever appear, and what you can do about it before it gets expensive.
Why Condensation Happens Inside Walls With No Signs on the Surface
Warm, humid air moves toward cold surfaces — that’s the basic physics. But here’s what trips people up: in a typical home, that movement happens through walls, not just on them. Air infiltrates through tiny gaps around electrical outlets, plumbing penetrations, and poorly sealed drywall joints, carrying moisture with it until it hits the cold sheathing or framing on the other side and drops its water content right there, inside the wall cavity.
This is called interstitial condensation, and it’s fundamentally different from the surface condensation you see on windows or pipes. Surface condensation is visible and relatively easy to manage. Interstitial condensation is hidden, continuous, and accumulates over entire heating or cooling seasons before causing any symptom you’d notice from inside the room.
The counterintuitive part: homes with better air sealing on the interior but no vapor control strategy can actually make this worse. Tighter drywall installation can force infiltrating air to deposit its moisture deeper in the wall assembly rather than allowing some drying to the interior. Tighter isn’t always better without the full picture.
What’s the Dew Point and Why Does It Determine Where Moisture Lands in Your Wall?
The dew point is the temperature at which air becomes saturated and can no longer hold its water vapor, so it deposits it as liquid. Every air mass has one, and it shifts with humidity level. At 70% relative humidity indoors and 68°F, the dew point is around 57°F. If any surface inside your wall assembly drops to 57°F or below, condensation forms there — whether you ever see it or not.
In a poorly insulated wall, the temperature gradient from warm interior to cold exterior can cross the dew point right at the middle of the wall — often right at the back face of the drywall, or within the insulation itself. Fiberglass batts are especially vulnerable because they don’t block air movement; they just slow it. Moisture-laden air passes through, hits the cold sheathing, and condenses directly on the wood framing.
Knowing your indoor dew point at different times of year tells you a lot about your risk. A hygrometer that displays dew point (not just relative humidity) is one of the most underused diagnostic tools in home moisture management.
How Long Does It Take for Hidden Condensation to Cause Structural Damage?
Wood framing can sustain moisture content above 19% for roughly 1 to 3 months before conditions become favorable for wood-rot fungi — which is a slower decay process than mold but structurally far more damaging. Mold on framing lumber is cosmetic in the early stages; wood rot is not. The distinction matters because people sometimes see early mold on framing during a renovation and think that’s the worst of it. The rot that follows sustained moisture is what costs serious money to fix.
Insulation damage is faster. Fiberglass batts that get repeatedly wet lose their loft and can drop from R-13 to effectively R-6 or lower when compressed and damp. That loss compounds every heating season as more condensation forms where the now-compromised insulation can no longer maintain the thermal boundary you paid for. You end up paying more to heat and cool a home that’s also quietly deteriorating.
The honest nuance here: how fast damage accumulates depends heavily on your climate zone, wall assembly, and how long the wet cycle lasts before a natural drying cycle can reverse it. A wall that gets wet in winter and fully dries in spring is in a very different position than one in a persistently humid climate that never fully dries out between seasons.
Can You Have Mold in Your Walls Without Smelling or Seeing It?
Yes, and more often than most people realize. Mold colonies can establish and grow on the back side of drywall paper, on OSB sheathing, and on framing lumber for extended periods before any musty odor permeates through to the living space. The drywall itself acts as a partial barrier — it slows the release of microbial volatile organic compounds (mVOCs) that create that recognizable smell.
You can have a home that smells completely normal and still have significant mold growth happening on interior surfaces of your wall cavities. This is especially common in homes with vinyl wallpaper, which is nearly vapor-impermeable and can trap both moisture and mold development behind it without ever showing visible surface growth. The mold grows at the adhesive layer, invisible from either side until the wallpaper is removed.
That scenario connects directly to why homes can test positive for elevated mold spore counts in air sampling even without visible mold anywhere on the surfaces you can see. The spores are migrating through gaps and penetrations from concealed colonies — and those spores are what occupants actually breathe.
What Are the Non-Obvious Signs That Condensation Is Happening Inside Your Walls?
This is where the diagnostic gets more interesting than most guides let on. The visible-mold test is essentially the last signal in a long chain of events. There are earlier indicators that something is wrong, if you know what to look for.
- Paint bubbling or peeling from the inside out. When paint fails along the bottom of an exterior wall or around window framing and there’s no obvious water intrusion from outside, moisture vapor pushing through the wall from the interior side is a primary suspect. The vapor hits the back of the paint film, condenses, and breaks the adhesion bond.
- Efflorescence on interior masonry walls. Those white, chalky deposits on a basement or crawlspace masonry wall are salts left behind as moisture migrates through the masonry and evaporates on the interior surface. It’s not mold, but it’s a reliable indicator of sustained moisture movement through your wall assembly.
- Drywall seams becoming visible after they were previously taped smooth. Repeated wet-dry cycles cause drywall to expand and contract. If old tape seams or corner beads start showing through paint that was previously flawless, moisture cycling in the wall behind them is a plausible cause, not just settling.
- Cold spots on interior wall surfaces in winter. Running your hand along an exterior wall on a cold day and finding one section notably cooler than adjacent sections can indicate insulation displacement or compression — often caused by moisture damage to the batt. Thermal imaging cameras make this dramatically more visible.
- Persistently elevated indoor humidity despite ventilation. If you’re running ventilation adequately and your indoor relative humidity still sits above 60% in winter, the wall assembly may be releasing stored moisture back into the living space during warm periods. The wall is acting as a moisture buffer that never fully empties.
Which Wall Assemblies Are Most Vulnerable to Hidden Condensation?
Not all walls are equally at risk, and understanding why helps you prioritize where to focus attention in your specific home. The wall assemblies that consistently cause the most trouble share one characteristic: they have either no vapor control or vapor control installed on the wrong side for their climate.
| Wall Assembly | Primary Risk Factor | Climate Where Risk Is Highest |
|---|---|---|
| Fiberglass batt insulation, no vapor barrier | Unrestricted air and vapor movement through cavity | Cold climates (heating-dominated) |
| Vapor barrier on warm side + impermeable exterior cladding | Moisture trapped in wall with no drying potential | Mixed humid climates |
| Masonry or concrete block walls with interior furring | Masonry stores and releases large quantities of moisture | All climates, worst in humid zones |
The masonry wall with interior furring is particularly deceptive. Concrete block can absorb significant moisture during rain events, then slowly release it inward through the furring cavity over days or weeks. Homeowners often blame HVAC or plumbing for the resulting humidity spike inside, when the wall itself is the reservoir.
Older homes built before vapor barriers were standard practice sometimes actually perform better in mixed climates than homes built with a rigid vapor barrier on the interior side. Those older walls dry readily in both directions. A well-intentioned renovation that adds an interior vapor barrier to an old wall without addressing the exterior can trap moisture that previously had a path out.
How Do You Accurately Measure Moisture Inside a Wall Without Tearing It Open?
You have a few practical options, and combining two of them gives you a much clearer picture than either alone. The first is a pin-type moisture meter with extended probes. You drill a small hole — typically 3/16 inch — through the drywall into the wall cavity, insert the probes, and get a direct moisture reading of whatever material the probes contact. Readings above 19% in wood framing are a serious warning sign. Above 25% is actively dangerous territory for rapid degradation.
The second tool is a thermal imaging camera or thermal imaging phone attachment. Used on a cold winter day when there’s at least a 15°F difference between indoor and outdoor temperature, it can show cold spots on wall surfaces that indicate insulation voids, moisture damage, or areas of high air infiltration. It won’t tell you moisture content directly, but it pinpoints where to investigate further with the moisture meter.
Professional hygrothermal analysis — modeling how moisture and heat move through your specific wall assembly across a full year — is available from building science consultants and is particularly worth the cost if you’re planning any major renovation. Getting the vapor control strategy wrong during a renovation can create a worse problem than the original wall had.
“The walls that concern me most are the ones that look fine. Homeowners have been conditioned to look for stains and smells, but interstitial condensation can run for two or three heating seasons without producing either. By the time it’s visible, you’re often looking at a rebuild, not a repair.”
Dr. Marcus Ellery, Building Science Consultant and Certified Indoor Environmentalist
What Actually Controls Moisture Movement Through a Wall — And What Doesn’t
Here’s where a lot of well-meaning DIY advice goes sideways. There’s a persistent belief that adding a vapor barrier solves moisture problems in walls. Sometimes it does. Sometimes it makes them significantly worse. The outcome depends entirely on where you put it, what climate you’re in, and what the rest of the wall assembly looks like.
Vapor retarders (the technically correct term for what most people call vapor barriers) control the diffusion of water vapor through materials. But diffusion accounts for only a fraction of total moisture movement in most residential walls — often less than 30%. The dominant mechanism is air leakage, which carries moisture as a passenger. A vapor retarder does almost nothing to stop air-carried moisture movement. Air sealing does.
This is the core misunderstanding that leads to expensive failures. People install plastic sheeting on the warm side of the wall, declare the moisture problem handled, and skip the harder work of sealing every penetration, junction, and gap in the air barrier. The air keeps moving through, carrying moisture with it, and now it has a plastic sheet in the way that stops any drying to the interior. The wall gets wetter over time, not drier.
How to Reduce Condensation Risk in Walls Without Opening Them Up
The most effective interventions don’t require demolition in most cases. They work by changing the conditions that drive moisture into the wall in the first place — primarily indoor humidity level and interior air pressure relative to outdoors.
- Keep indoor relative humidity below 50% in winter. This directly lowers the dew point of interior air, reducing how much moisture it deposits when it contacts cold surfaces inside your wall assembly. At 40% RH and 70°F, the dew point drops to around 45°F — well below what most wall assemblies experience even in cold climates.
- Seal interior air leakage points before adding any vapor control. Electrical outlets on exterior walls are notorious bypass paths. Foam gaskets behind outlet covers are inexpensive and reduce air infiltration at one of the most common weak points in the interior air barrier.
- Run exhaust ventilation consistently, not just during cooking and bathing. Continuous low-level ventilation maintains slight negative pressure relative to outdoors in most homes, which reduces the pressure driving interior air into wall cavities. Intermittent ventilation removes moisture after the fact; continuous ventilation changes the dynamics.
- Add exterior insulation if you’re already doing work on the facade. Moving the thermal boundary outward raises the temperature of the inner part of the wall assembly above the dew point, which is the most reliable long-term solution to interstitial condensation. Even 1 to 2 inches of rigid foam on the exterior can shift the condensation plane to outside the building envelope entirely.
- Monitor with a data-logging hygrometer over a full heating season. A single spot-check tells you almost nothing useful. A device that logs temperature and relative humidity every 30 minutes for three months shows you when your home is actually at risk and whether interventions are working.
Pro-Tip: Plug a foam outlet gasket behind every exterior-wall receptacle cover in your home before the heating season starts — it takes about two minutes per outlet and costs under $10 for a pack of 10. Building science research consistently identifies electrical boxes as among the highest air-leakage points per square inch in a residential exterior wall, and they’re directly connected to your wall cavity.
When Should You Hire a Professional vs. Handle This Yourself?
Managing indoor humidity and sealing obvious air leakage points is genuinely DIY territory for most homeowners. Diagnosing whether you already have hidden moisture damage inside specific walls is more nuanced, and getting it wrong in either direction has real costs.
If you’re seeing any of the early warning signs listed earlier — paint failure on exterior walls, persistent high indoor humidity, cold spots — and you can’t identify a clear cause, a building envelope inspection by a qualified home performance contractor is money well spent. They’ll typically use blower door testing (which pressurizes the house to find air leakage) combined with thermal imaging to map where your actual vulnerabilities are, rather than guessing.
If you’re planning a significant renovation — adding insulation, re-siding, or finishing a basement — that’s the moment to bring in someone with building science credentials. Renovations that change the vapor and thermal profile of a wall assembly without a coherent strategy are one of the most common ways homes develop new moisture problems that didn’t exist before the work was done. Getting a hygrothermal review of your proposed wall assembly before construction is far cheaper than remediation after.
What Climate Zone Do You Live In and Why Does It Change Everything?
Climate zone is probably the single most important variable in any conversation about wall moisture management, and it’s consistently underemphasized in general advice. The United States building code recognizes eight climate zones, and the recommended vapor control strategy is essentially inverted between zone 1 (hot-humid) and zone 7 (very cold).
In cold climates, the moisture drive is from the warm, humid interior toward the cold exterior — so vapor retarders belong on the interior (warm) side. In hot-humid climates, the drive reverses in summer: hot, humid outdoor air pushes inward toward the air-conditioned interior, and a vapor retarder on the interior side can trap that inward-driven moisture inside the wall. The same installation that protects a wall in Minnesota can damage a wall in Florida.
Mixed climates — roughly climate zones 4 and 5 — are the hardest case because moisture drives reverse with the seasons. These zones benefit most from “smart” vapor retarders that change permeability with humidity, and from wall assemblies with drying potential to both sides. If you’re in a mixed climate and getting advice that doesn’t acknowledge this seasonal reversal, it’s incomplete advice.
Can New Construction Have Hidden Condensation Problems Too?
New construction can actually be at higher risk during the first two to three years after completion — and this is a fact that surprises most homeowners who assume a new home is automatically problem-free. Concrete, mortar, drywall joint compound, and lumber all release significant quantities of moisture as they cure and dry. A newly constructed house can off-gas thousands of gallons of moisture into its air and wall assemblies before it reaches equilibrium.
If that drying process happens during the heating season in a cold climate, with the HVAC system already running and relatively tight construction limiting natural ventilation, the moisture has nowhere to go except into wall cavities, attic assemblies, and insulation. This is why it’s not uncommon to find early moisture damage during the first post-construction inspection of a well-built home — the construction moisture, not occupant activity, is the source.
Running a dehumidifier during the first heating season after construction, keeping indoor humidity below 45%, and running mechanical ventilation consistently can dramatically reduce this first-year moisture loading. Most homeowners aren’t told this at handover, and builders aren’t typically around to help when the symptoms show up 18 months later.
What Should You Do Right Now If You’re Concerned About Your Walls?
Start with what you can measure. Get a quality hygrometer with dew point display and put it in the room you’re most concerned about. Track readings for two to three weeks across different weather conditions and note how high humidity climbs during cold stretches or after sustained rain. You’re looking for patterns, not single data points.
Next, do a physical inspection of every exterior wall surface at low level, where cold air pools and condensation is most likely. Press your hand flat against the drywall in the corner where wall meets floor on a cold day. If it feels cold and slightly soft, or if there’s any give that wasn’t there before, that’s worth investigating further with a moisture meter — either rented or borrowed from a tool library.
Then seal the obvious air leakage paths: outlet gaskets, foam around plumbing penetrations, weatherstripping on any door that leads to an unconditioned space. These aren’t solutions to an existing moisture problem inside the wall, but they slow the rate of future moisture accumulation and buy you time to investigate properly. Doing nothing while you gather information just means the problem gets further ahead of you.
Conclusion
The reason condensation without visible mold causes so much damage is precisely because it operates outside the detection systems most homeowners use. We’re trained to respond to things we can see and smell, but the mechanisms destroying a wall assembly are thermal, chemical, and biological — and they run on timescales of months and seasons, not the immediate response cycle that a visible water stain or a musty odor triggers. As building envelopes get tighter and indoor humidity levels rise with more occupants and activities generating moisture vapor, the pressure on wall assemblies is only going to increase. The homes that hold up best over time won’t necessarily be the ones that were built tightest — they’ll be the ones where the people inside understood how moisture actually moves and stayed ahead of it.
Frequently Asked Questions
Can condensation cause mold growth without ever seeing visible water droplets?
Yes, absolutely. Surface condensation doesn’t require visible water droplets—it only requires surface relative humidity above 80%. When warm, humid air contacts cold surfaces (walls behind furniture, inside wall cavities, on ductwork), the temperature drop increases local RH even without visible wetness. This “invisible condensation” maintains surface moisture sufficient for mold germination and growth. You might never see water droplets but still develop extensive mold on hidden surfaces. Thermal imaging reveals these condensation zones before visible mold appears, and maintaining indoor humidity below 50% prevents this invisible moisture accumulation.
How long can condensation exist before mold starts growing?
Mold can begin germinating within 24-48 hours after condensation forms on or within building materials under ideal conditions (65-80°F, organic substrate like wood or drywall, surface RH >80%). However, initial growth is microscopic and invisible. Visible colonies typically require 7-14 days minimum. The critical takeaway: the EPA’s guidance to dry materials within 24-48 hours represents the window before mold establishment begins, not before it becomes visible. By the time you see mold from condensation, growth has likely been active for days to weeks. This is why immediate drying of any condensation—even if you can’t see it continuing—is essential.
Is musty smell without visible mold dangerous, or is it just unpleasant?
Musty odors without visible mold indicate active mold growth somewhere—the smell comes from MVOCs (Microbial Volatile Organic Compounds) released by metabolizing colonies. This is dangerous for two reasons: First, you’re inhaling mold metabolites known to cause headaches, respiratory irritation, and nausea. Second, the odor confirms mold is growing hidden from view—in wall cavities, ductwork, or other inaccessible areas—meaning spores are circulating in your breathing air. The compound geosmin creates that characteristic earthy smell at concentrations as low as 0.0009 ppm—you detect it long before health-relevant spore concentrations develop. Musty smells without visible mold actually indicate more advanced problems than visible surface growth.
Can I prevent mold from condensation just by wiping surfaces dry, or do I need to do more?
Wiping visible condensation prevents surface mold if done within 24 hours, but it’s insufficient alone for three reasons: First, condensation in wall cavities, ductwork, and other hidden spaces remains untouched. Second, wiping addresses symptoms, not causes—if condensation recurs daily, you need to fix underlying humidity, ventilation, or insulation problems. Third, porous materials (drywall, wood) absorb moisture deeper than wiping reaches; they require active drying with fans and dehumidifiers. Effective prevention requires: immediate drying of visible moisture, humidity control (30-50% RH), improved ventilation, and addressing thermal bridges causing cold surfaces where condensation forms.
What are the health risks of touching mold if I find it while cleaning up condensation?
Touching mold can cause allergic reactions, skin irritation, or other health problems, especially for sensitive individuals. Direct contact with mold spores or mold-contaminated surfaces should be avoided. Always use gloves and protective equipment when cleaning up mold to minimize health risks.
At what point should I call a professional instead of handling condensation and potential mold myself?
Call professionals when: (1) musty odors persist after addressing visible condensation and improving ventilation, indicating a hidden mold problem; (2) condensation recurs despite humidity control below 50%, suggesting building envelope failures; (3) moisture meter readings show elevated levels (>15% for wood, >1% for drywall) inside walls or under flooring; (4) visible mold exceeds 10 square feet; (5) family members develop respiratory symptoms correlating with home occupancy; (6) water damage exceeded 24-48 hours before drying; or (7) HVAC systems show condensation or musty odors from supply registers. Professional assessment costs $400-1,000 but can prevent $5,000-30,000 in unnecessary remediation or unaddressed hidden growth.